
I promised something extra special for the last day, and I hope this delivers. It's a card with a matching gift tag. 😃
But wait - there's more!!! It's TWO cards and the second one has a matching gift card holder/tag!

We'll start with the first one.....
Measurements for card
- Card base: Mint Macaron 5-1/2" x 8-1/2", scored & folded at 4-1/4"
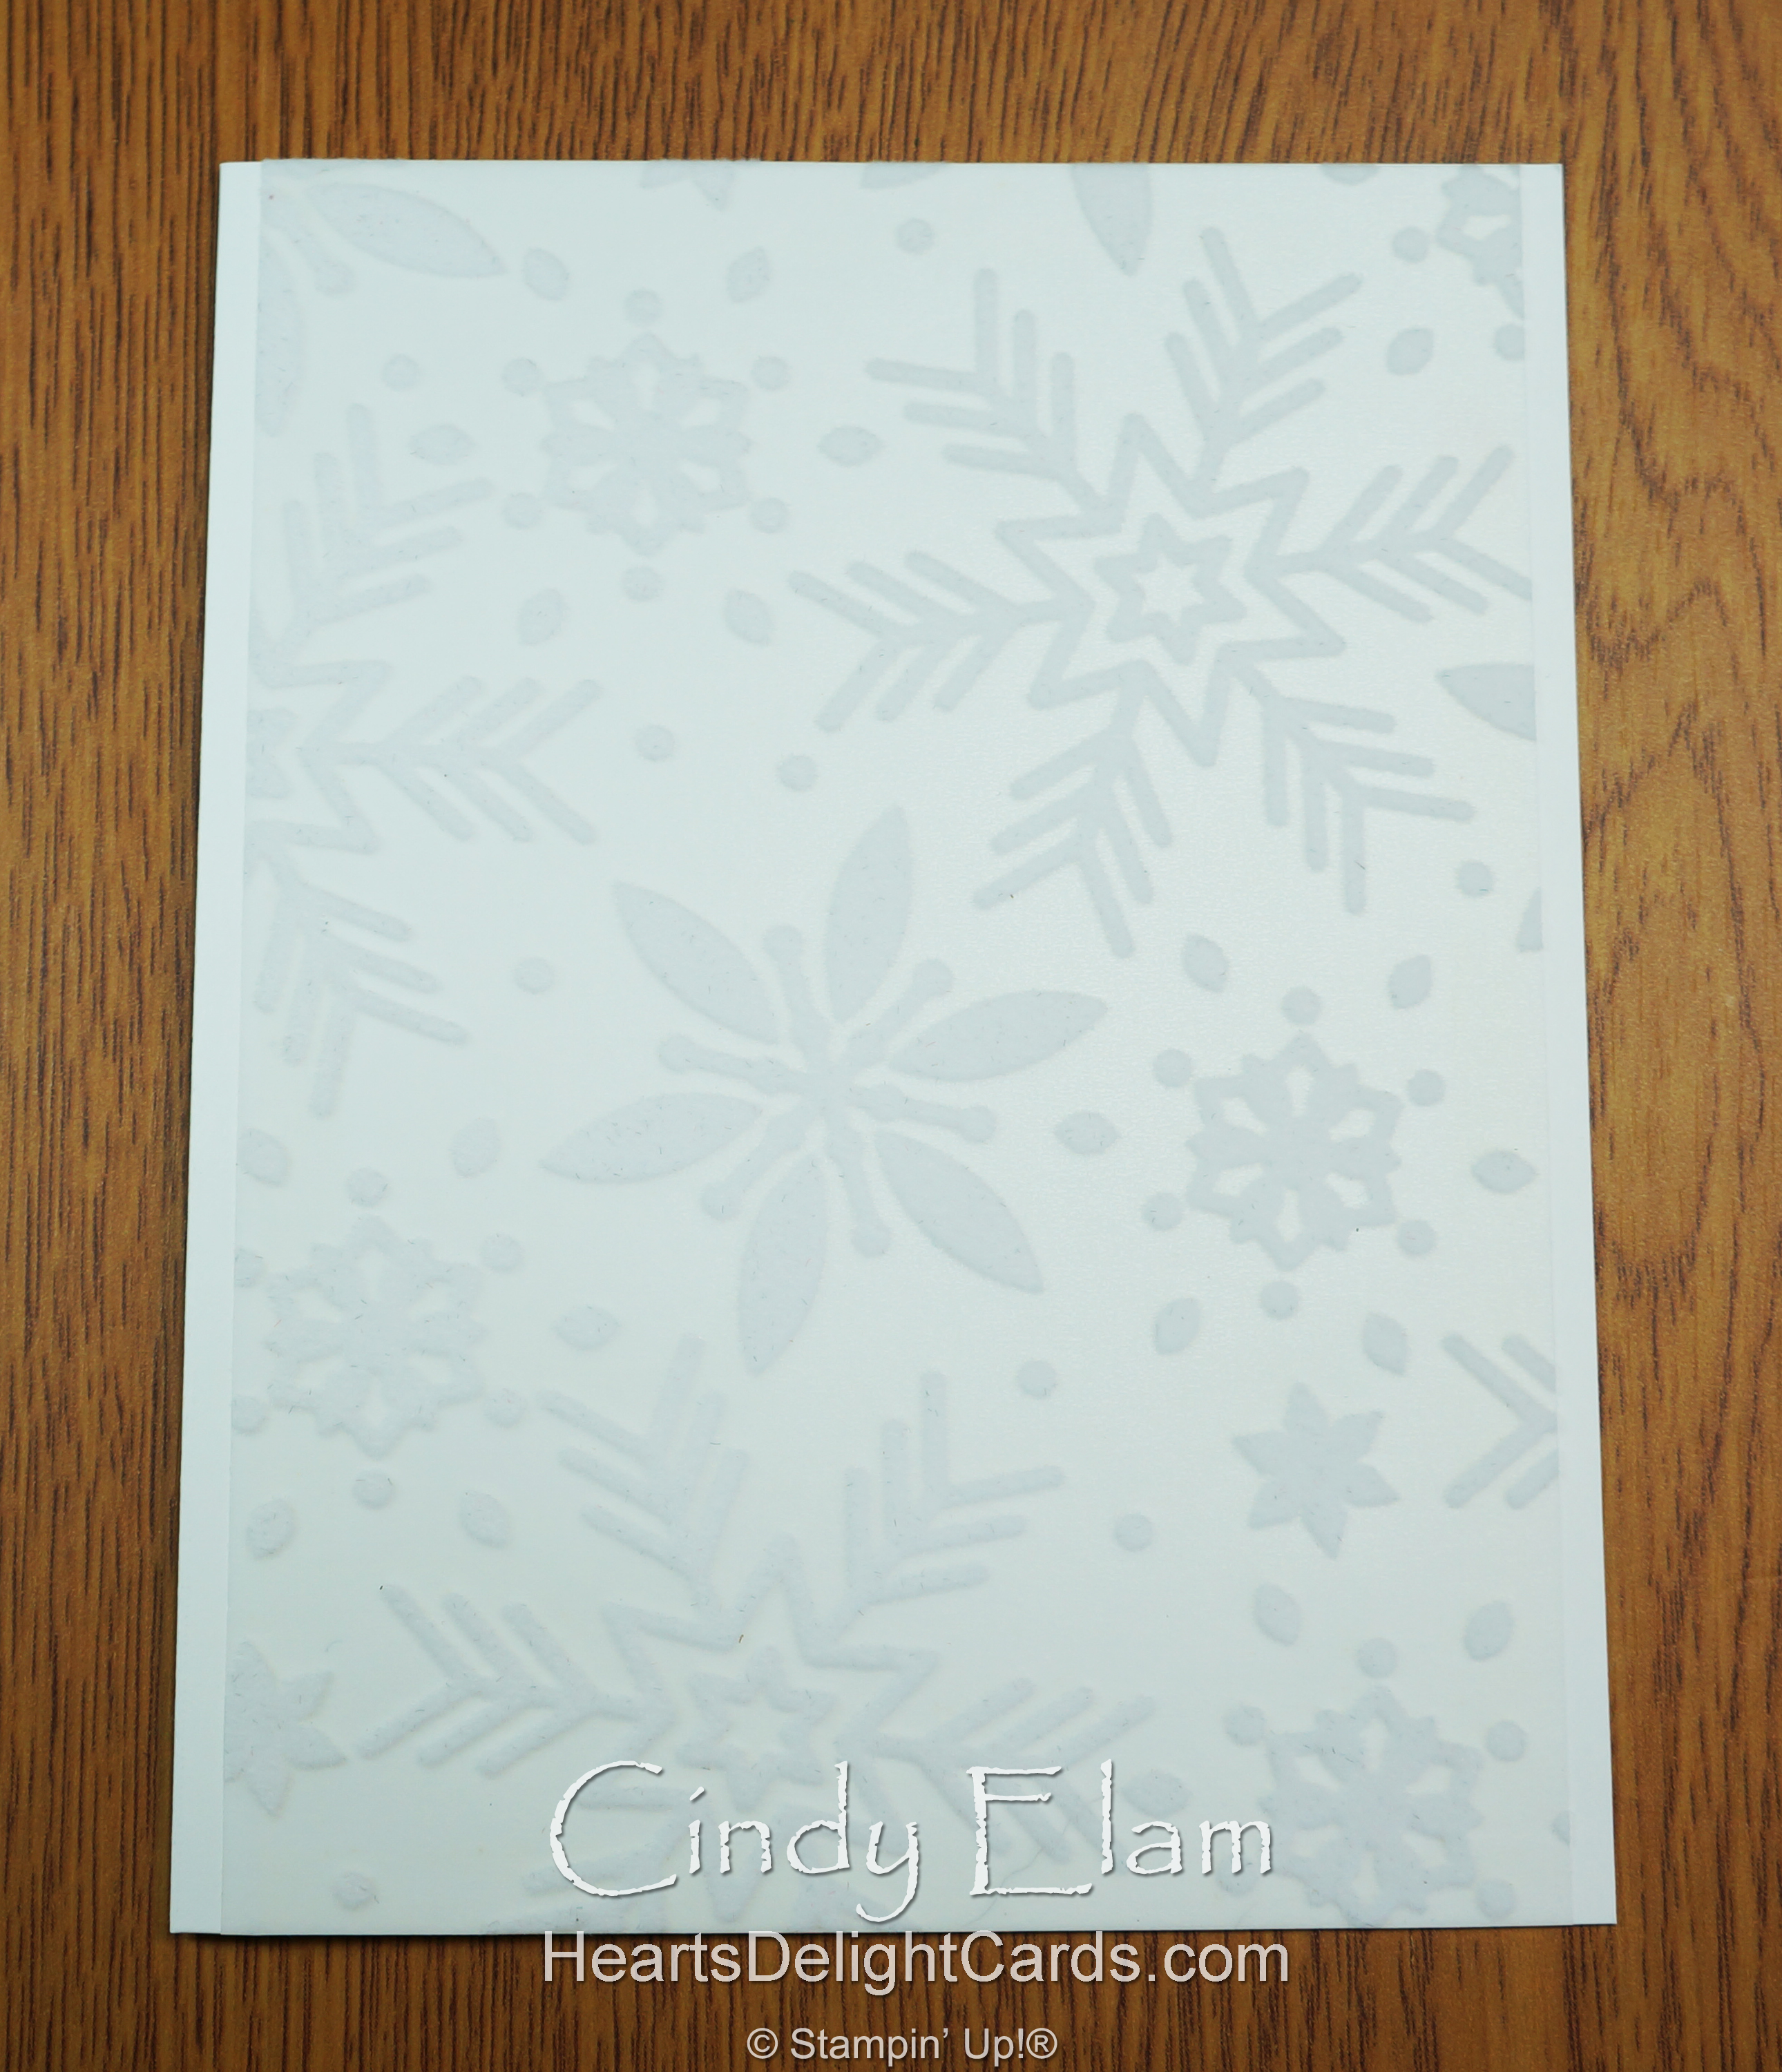
- Embossed background: Basic White 4" x 5-1/4"
- DSP strip: Santa Express 1-1/2" x 5-1/4"
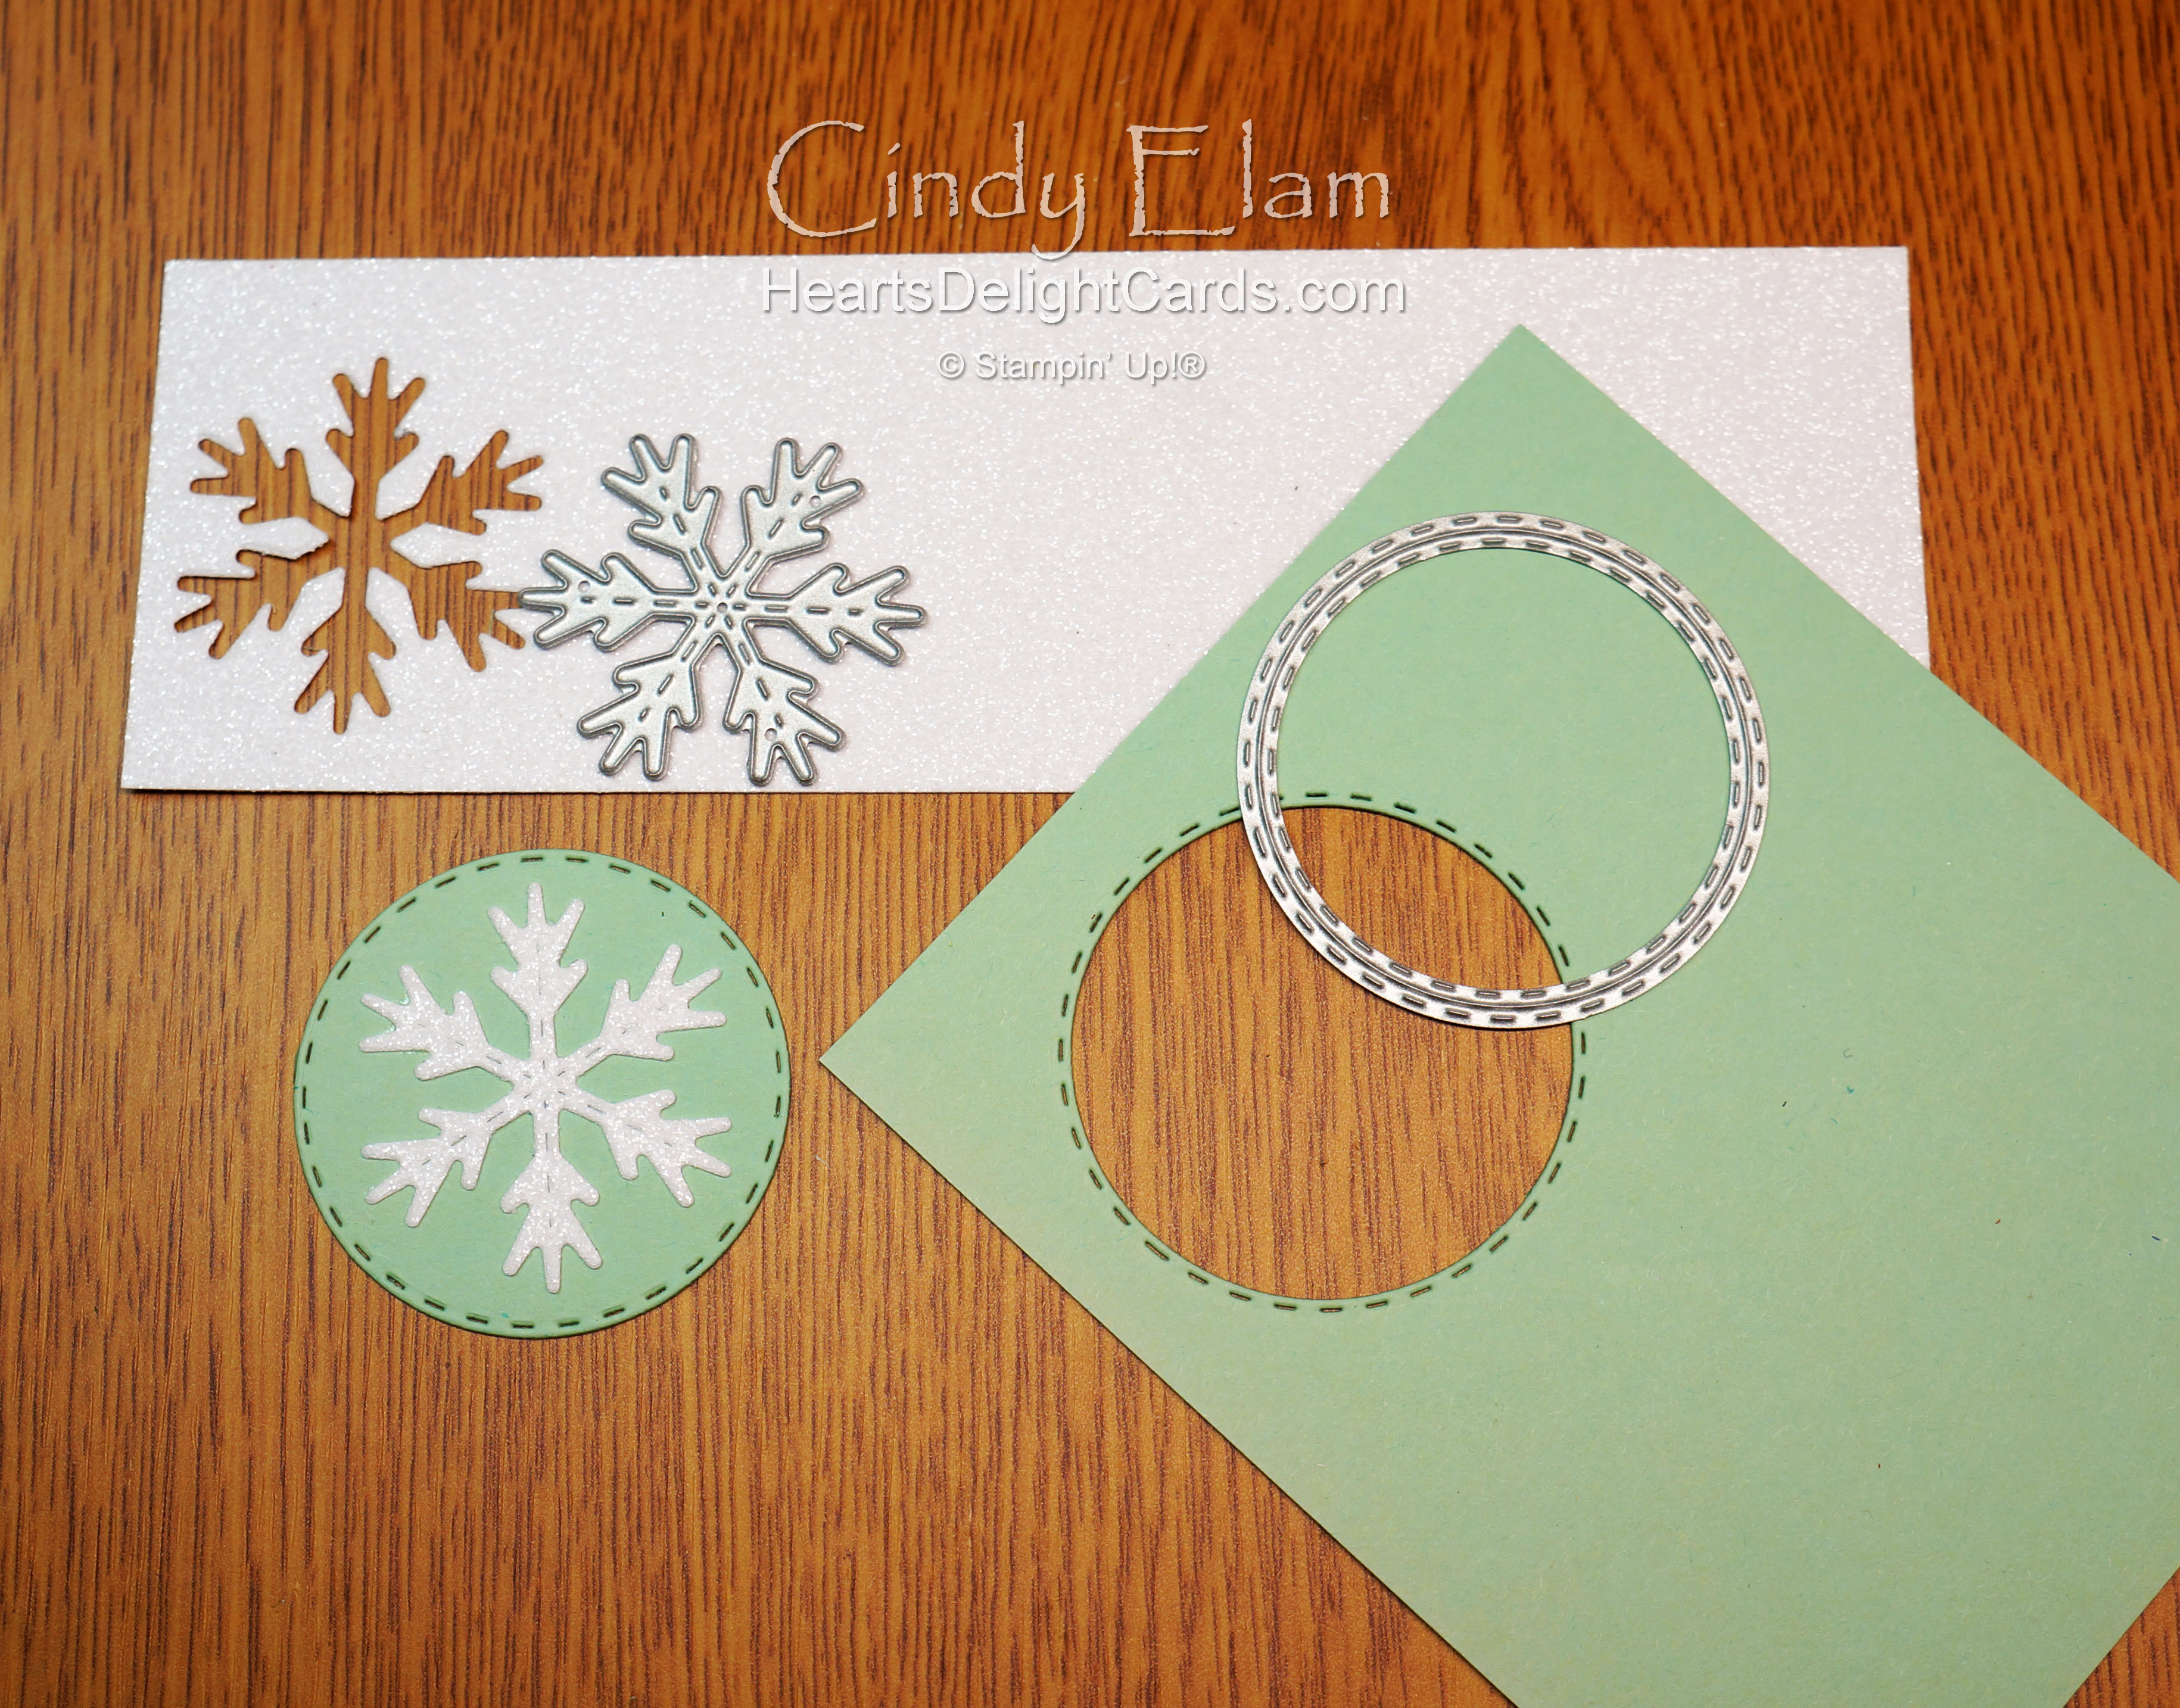
- Snowflakes: White glimmer 1-3/4" x 6" (cut 4 snowflakes, one to use on tag)
- Stitched circle: Mint Macaron 2" x 4" (cut 2 circles, one to use on tag)
- Greeting banner: 3/8" x 2-1/2"
- Silver cord: 7" length
1. Emboss background with houses folder, adhere DSP to bottom, wrap silver cord around and adhere ends to back, then adhere all to card base.


2. Die cut snowflakes from glimmer and stitched circles from Mint Macaron. Glue snowflake to circle.
3. Stamp greeting (borrowed from Leaves of Holly stamp set) in Shaded Spruce and cut banner end. Adhere to back of snowflake/circle, then attach to card with dimensionals.


4. Glue two snowflakes to card and add silver pearls to centers of snowflakes.

Measurements for tag
- DSP: Santa Express 2-1/2" x 6"
- Tag liner: Copy paper 2-1/2" x 3-1/2"
Tag instructions
1. Die cut scalloped tag from DSP, and half the tag from copy paper.

2. Stamp "To From" on liner and adhere inside tag.

3. Glue snowflake to stitched circle, attach with dimensionals, add silver pearl to center and silver cord for hanging.


And now for the second card....
Measurements for card
- Card base: Poppy Parade 5-1/2" x 8-1/2", scored & folded at 4-1/4"
- Embossed background: Basic White 4" x 5-1/4"
- DSP strip: Santa Express 1-3/4" x 5-1/4"
- Greeting: Basic White 2" x 3-1/2"
- Mat: Poppy Parade 1-1/2" x 2-3/4"
- Gold cord: 7" length plus enough for bow
Card instructions
1. Emboss background with mountains folder, adhere DSP to bottom, wrap gold cord around and adhere ends to back, then adhere all to card base.


2. Stamp greeting in Poppy Parade and die cut with stitched rectangle label. Adhere to mat, then attach to card with dimensionals.

3. Tie a bow and attach with glue dot. Add gold sequins to wheels and white sequins to sky.

Measurements for tag
- Tag base: Poppy Parade 3-5/8" x 8-1/2"
- DSP: Santa Express 3" x 4-1/2"
- To/From label: Basic White 2" x 3-1/2
Tag instructions
1. Cut Poppy Parade using gift card/tag die, then fold on scorelines and form pocket. (Note: Tear & Tape is too wide, so I used a different brand that is just under 1/4" wide.)


2. Find the image you want to use and die cut with the tag die. Trim off excess at scorelines.


3. Glue DSP to tag and add gold sequins for wheel hubs.

4. Stamp "To From" in Poppy Parade and cut with rectangle die. Adhere to back of tag and add gold cord for hanging.


5. Heat emboss "Be Jolly" on the leftover scrap of Poppy Parade, die cut with matching die and attach to front of tag with dimensionals.

Product List
")
")


 Designer Series Paper")
 Glimmer Paper")


 Specialty Vellum")


