Wednesday, June 29, 2016

Alternate Paper Pumpkin

When we got a sneak peek at the sequins that would be included in this month's Paper Pumpkin kit, I thought for sure that we would be making shaker cards, and I was giddy at the prospect. Well, it turns out that the sequins were for clear little banner bags, to use as banners or bags on the cards. Hmmm.... I'm not really into the whole banner mania that's been going on for a while, so I decided to turn my kit components into shaker cards. That's the beauty of it; most of the time I make 'em just as intended, but sometimes I have to color outside the lines, lol.

Smiley from Millan.Net


This one was made for my new Paper Pumpkin subscribers, to show them some alternate uses for their P.P. kits. I do love the sequin colors! Beside gold and white, there are Flirty Flamingo, Peekaboo Peach, and the iridescent ones look like Mint Macaron. So pretty!

There isn't really a recipe for this card. I used the Best Badge punch on a piece of Whisper White, then cut it out with Layering Circles Framelits, making sure there was enough room around the edges for the Foam Adhesive Strip. Cut a slightly larger scalloped circle in Peekaboo Peach, placed the punched circle on and adhered the edges in a couple places, then lined the punch up with the previously punched badge. (I didn't try to punch two layers of cardstock at once - that would have been too much for the punch to handle, I think.)

A piece of Window Sheet was stamped with the bird cage using Basic Black Archival ink. I let it dry completely before cutting and adhering to the back of the badge opening. At this point the baker's twine and bow were adhered to the top of the bird cage.

Another WW circle was cut the same size as the first. The foam strip was added around the edge of this circle, some sequins were placed in the middle, the paper backing was peeled off and the top lined up and pressed down. Handy Hint: When you need to use the foam strips around a curve, make little snips every 1/4" or so, about halfway through the strip. It'll make going around those curves a breeze!


If you are a Paper Pumpkin subscriber, you can get refill kits (without the stamps and ink spots) while supplies last!

Product List

Monday, June 27, 2016

Swirly Bird Thanks


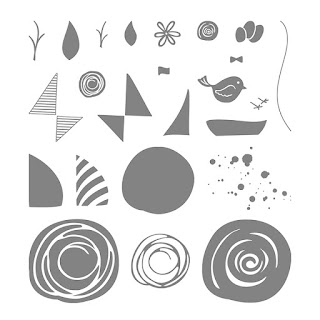
There aren't any birds on this card, so why call it Swirly Bird Thanks? Because that sailboat is one of the images in the Swirly Bird stamp set, which does have a bird. And swirlys. And flowers. And spatters, too. Calling it Swirly Boat Flower Bird Spatters would just take up too much room, right?

http://www.stampinup.com/ECWeb/ProductDetails.aspx?productID=141749&dbwsdemoid=2054459
Here's the "How To"
Ocean/clouds: Watercolor Paper 3" x 4-1/2" (1/4 sheet)
Mat: Night of Navy 3-1/4" x 4-3/4"
DSP: Floral Boutique 4" x 5-1/4"
Scraps of Whisper White and Real Red for greeting banner and stamping boat and sails
Card base:  Whisper White  5-1/2" x 8-1/2", scored at 4-1/4" and folded
  1. Adhere DSP to card base.
  2. Use a 3" x 3" sticky note to cover one side of the watercolor paper. Sponge an ocean using Dapper Denim. Sponge the horizon a bit darker with Night of Navy.
  3. Cut three sticky notes into freeform cloud shapes. Place one near the horizon and use a sponge with Marina Mist to "push" a bit of color, starting the note, onto the paper. Repeat with the other two cloud masks, moving up a bit each time.
  4. Stamp boat and sails, and cut them out. Sponge edges for depth.
  5. Stamp greeting on Whisper White and cut banner ends. Cut Real Red 1/8" larger than greeting banner and cut banner ends. Fasten together.
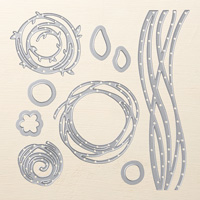
  6. Cut Dapper Denim using swirls from Swirly Scribbles die. Adhere to ocean using Fine-Tip Glue Pen. Trim ends even with watercolor paper.
  7. Adhere ocean/clouds to Night of Navy mat, and both pieces to card base over DSP.
  8. Draw a mast approx. 1" from right side and stamp flag at top. Fasten sails on either side of mast with Stampin' Dimensionals (cut down to fit). Place boat under sails on dimensionals.
  9. Place banner as shown using SNAIL or glue. Add stars from In Color Enamel Shapes.
Product List

Sunday, June 19, 2016

Tour de NEW CATALOG!!!

Yep, this month's theme for the Tour de Freaks is anything from the new catalog, woohoo! Since I love just about Every. Darn. Thing in that catalog, narrowing it down was a nightmare! I'm sure the other participants are going to wow you with their projects, so I guess I needn't worry that I couldn't cram them all in here. If you started at the beginning, then you just landed here from Wendy's blog, Wickedly Wonderful Creations. Weren't her projects uh-MAZE-ing? Especially because she just ran 500 miles, and then she ran 500 more! (Well, maybe that's exaggerating a bit....but she did run a half FULL marathon on The Great Wall of China!) To see ALL the Control Freaks creations, just click on the link at the bottom of each person's post.

In an effort to keep things moving right along, we try to limit ourselves to two or three projects, so with extreme reluctance and great self-sacrifice to be a good girl, I only made two cards to share (heehee!). I've really been on a water-coloring binge lately, and both cards reflect it. So, first up is a quickie watercolor wash background, which I think sets off the Flourish Thinlits die beautifully. It really lets the die cut stand out, doesn't it? At first I was going to use colored cardstock, but then thought the au naturel watercolor paper looked better. Some splatters from Gorgeous Grunge added some visual interest, too.

STAMPS: Flowering Flouishes, Gorgeous Grunge  CARDSTOCK: Watercolor Paper, Flirty Flamingo      INK: Flirty Flamingo, Basic Black Archival  ACCESSORIES: Aqua Painters, Big Shot, Flourish Thinlits Dies, 5/8" Burlap Ribbon, 1/4" Gold Natural Trim, Metallics Sequin Assortment, Fine-Tip Glue Pen

The second card took me out of my comfort zone a wee bit. Cutesy cards are really not my style, but the Bella & Friends stamps are so adorable, I just couldn't resist. Besides, now I can make cards to donate to our local animal shelter! (I drew a smile on the pup, because my shelter-rescue dog is always smiling, if not downright laughing.) This would be a great birthday card for ANY age or gender!

STAMPS: Bella & Friends, Suite Sayings  CARDSTOCK: Crumb Cake, Marina Mist, Dapper Denim, Real Red, Watercolor Paper, Subtles DSP Stack  INK: Basic Black Archival, Soft Suede, Real Red, Crushed Curry  ACCESSORIES: Aqua Painters, Balloon Bouquet Punch, Project Life Corner Punch, 5/8" Burlap Ribbon, Gold Metallic Thread, White Stampin' Chalk Marker

Because I was such a good girl (who's a good girl? I was! Yes, I was!), that's all I have for today. Now click the link and go see what Debbie Henderson made over at Debbie's Designs! Thanks for stopping by!

http://debbiesdesignsblog.blogspot.com/2016/06/controlfreaksjune2016.html

Tuesday, June 14, 2016

Five Hundred Punches


Here's another one of my favorite bundles from the new catalog, the Best Birds stamp set with the Birds and Blooms Thinlits dies. Such a cute, quick, and easy card to make when you have the right tools, and bundled together you save 10%!

We are greatly enjoying the wide variety of birds here in East Tennessee, so I knew I had to get that bundle as soon as I saw it. And no, there were no punches used on that card....but there were on the color chart below!


I made ten of these charts yesterday to send to new customers, and it took five hundred punches of the Petite Curly Label punch to make them. My thumb and wrist sure felt in last night, let me tell ya, but  it was worth it! Why did I do it? Because I like to include the color chart when sending out catalogs. It's so nice to see the true colors of the cardstock, and I like to spoil my customers a little bit, because I really appreciate them!

Smiley from Millan.Net

Would you like the new Stampin' Up! annual catalog with a custom-made-by-yours-truly color chart? If you are a new customer and don't already have a demo that you're working with, just place a minimum $25 order with me (tax and shipping excluded), and I'll send one out right away! Included will be an Inky High J-INKS Rewards sheet. You can earn a free stamp set (up to $25 value) when the sheet is full! Details are on the rewards sheet.

Now back to our regularly scheduled programming the card.

Here's the "How To"
Circle behind bird: Pool Party cut with third largest Layering Circles die (2-3/8" diameter)
Bird: Marina Mist 2-1/2" x 3-1/2"
Branch: Pear Pizzazz 2" x 5"
Greeting: Scrap of Whisper White
Card base: Whisper White  5-1/2" x 8-1/2", scored at 4-1/4" and folded
  1. Emboss front of card base with Sparkle embossing folder.
  2. Stamp grid in Pool Party ink on circle and attach to left of center on card base.
  3. Stamp bird in Basic Black Archival ink on Marina Mist cardstock and cut out with bird die.
  4. Stamp branch on Pear Pizzazz cardstock and cut out with branch die. Color wood with Soft Suede marker.
  5. Glue branch over circle with Multipurpose Glue.
  6. Place Stampin Dimensionals on bird's head and back and remove liners. Place a little glue on bird's feet and adhere to branch.
  7. Stamp whatever greeting you want, punch out, and adhere to card with dimensionals. (I used a greeting from Flourishing Phrases and the now-retired Washi Label Punch.)
Product List