Monday, October 31, 2016

Designer Series Paper

https://www.stampinup.com/ECWeb/ItemList.aspx?categoryid=10400&dbwsdemoid=2054459

When I refer to DSP, most of you know that I'm talking about Designer Series Paper. Well today is the last day for the Buy Three Get One FREE DSP Sale. This is a great way to stock up on the patterned paper that makes it SO EASY to make a card. Stampin' Up! even put together some card sketches with sample cards so you can see how quick and easy (and CUTE!) the cards can be! Here are some examples (click to enlarge)....


These are also great ways to use up your stash, even the scraps! I'm going to challenge myself to use up as much DSP as I can before the end of the year, since I know there will be new "can't live without" DSP coming in January, and my storage space is limited!

Sunday, October 30, 2016

Warm Winter Wishes


My BFF sent me a stamp set that she had a duplicate of - gee, I can't imagine how that could happen! I mean, really, who could possibly forget that they had ordered something, and order it again? Oh yeah, that would be me. More times than I care to admit. So anyhoo, I was the lucky beneficiary of her forgetfulness and received this cute stamp set out of the blue one day. Can we say Happy Mail?!

Since we just had out first frost last weekend, and I actually got to wear a sweater, I figured it was appropriate to bring out the comforting images of mittens, knit cap, and cable knit. The images are from Simon Says Stamp Winter Warmth; the cable knit is Stampin' Up!


Here's the "How To"
 Images: Very Vanilla 2" x 6"
 Mat: Cherry Cobbler 2" x 8"
 Greeting: Very Vanilla 1-1/2" x 4-1/8"
 Embossed background: Very Vanilla 4-1/4" x 5-1/2"
 Card base; Very Vanilla 5-1/2" x 8-1/2" scored and folded at 4-1/4"
  1. Stamp mittens and cap (evenly spaced) on larger Very Vanilla strip using Basic Black ink. Color with Cherry Cobbler marker and punch out each image with 1-1/2" circle punch. Stamp hearts on mittens with Cherry Cobbler ink.
  2. Die cut four 1-5/8" circles from Cherry Cobbler strip. Adhere images to circles. Adhere snowflake to remaining circle. Note: I used a retired Snowflake Element; you can use a die cut or whatever works in that space.
  3. Stamp greeting and scarf on smaller Very Vanilla strip using Cherry Cobbler ink. Color scarf with marker. Note: I used an Avery Elle die for the pierced border. You can use a paper piercing tool if you don't have a die. Adhere Cherry Cobbler ribbon under upper edge of greeting panel, leaving ends to wrap around embossed panel.
  4. Emboss Very Vanilla with Cable Knit folder, then trim down to 4-1/8" x 5-3/8". Adhere greeting to bottom, wrap ends of ribbon to back and adhere.
  5. Attach images with dimensionals, and snowflake with liquid glue (it already sticks up, so don't use dimensionals!).
  Product List

Saturday, October 29, 2016

Thoughtful Branches Christmas


I'm still trying to decide what I'm going to do for Christmas cards this year. I figure since I work better and do some of my best designing when I'm nearing a deadline, inspiration isn't going to strike until the eleventh hour. When it does, there will be many late nights rushing to get things completed. I just hope the finished project, whatever it ends up being, is worth the stress!


This is one card the won't make the cut. The inspiration came from a card on Pinterest (that I can't find now), because I thought the colors looked Christmas-y. But even though I like the Emerald Envy glitter embossing powder on the tree, I'm not liking the layout much. Back to the drawing board!

Here's the "How To"
 Image: Very Vanilla 4" x 5-1/4"
 DSP strip: Moroccan DSP 3/4" x 5-1/4"
 Greeting: Emerald Envy 2" x 2"
 Mat behind greeting: Gold Glimmer 2" x 2"
 Card base: emerald Envy 5-1/2" x 8-1/2" scored and folded at 4-1/4"
  1. Stamp greeting in Basic Black on Emerald Envy square, and punch with circle punch. Die cut glimmer paper with 1-5/8" circle die. Adhere greeting to glimmer paper.
  2. Adhere DSP to left side of Very Vanilla. Stamp tree trunk and hills in Tip Top Taupe.
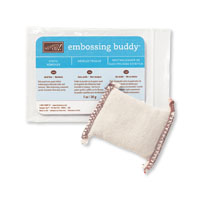
  3. Rub embossing buddy over cardstock and stamp tree leaves in VersaMark. Cover with Emerald Envy embossing powder, tap off excess, and heat with heat tool.
  4. Emboss just the Very Vanilla with Softly Falling embossing folder (not the DSP).
  5. Wrap gold baker's twine around and tie a bow near bottom left of Very Vanilla. Adhere greeting just above bow with dimensionals.
  6. Adhere all to card base.
Product List

Friday, October 28, 2016

Newton's BFF-day Wishes


Sometimes you need to put a little something extra into the birthday wishes for a special someone. My BFF is catching up with me in the age department (for the next three months, anyway!), and I wanted to send her some extra special birthday wishes from me and Da Punk. (Oh, and my hubby and the dog, too, of course!) I tucked a Starbucks gift card inside, and sent it along with a few stamping goodies I thought she might like. Her birthday isn't until next week, but I thought we should start the celebrating early!

Smiley from Millan.Net

The stamps are from Newton's Nook, colored with Copics, and the stitched rectangle is from Lawn Fawn. But everything else is Stampin' Up!

Product List