Tuesday, January 30, 2018

Labeled Dividers

When I made the dividers for labeling the DSP in the bins, I took pictures. But then I thought "No one would be interested in this" so I didn't post them. Well, I was wrong, so I'm posting them now! Thank you, Barbara, for asking!

I repurposed the thick white backing sheets that come in the DSP packs. You will be able to cut four dividers (4-1/2" x 6") from each sheet. If the lettering bothers you (I didn't mind, since it would be covered), then you will get three clean dividers.

Here is how I made them tabbed:
  1. I wanted to cut 3" off the divider to make the tab, so I placed a piece of Washi tape on the Stampin' Trimmer at the spot where I wanted to stop the cut.
  2. The divider was placed so the right long edge was at the 3/4" line, then I slid the cutting blade down to the Washi "stop" point.
  3. The excess was trimmed off with Paper Snips.
  4. The Envelope Punch Board was used to punch the "tabs" by sliding the tab edge in to the exact middle of the punch.
  5. This was done on each side.
  6. Then it was simple to label everything with a fine-tip Sharpie!


    Product List

Monday, January 29, 2018

Final Organizing Tips, Part 3 of 3

 Beautiful Peacock, SAB, Sale-A-Bration 2018, Stampin' Up!,

Here is today's attention grabber. Since I had the stamp out for yesterday's Stamp Review Crew blog hop, I threw together this card. (Products used are listed at the bottom.)

 Beautiful Peacock, SAB, Sale-A-Bration 2018, Stampin' Up!,

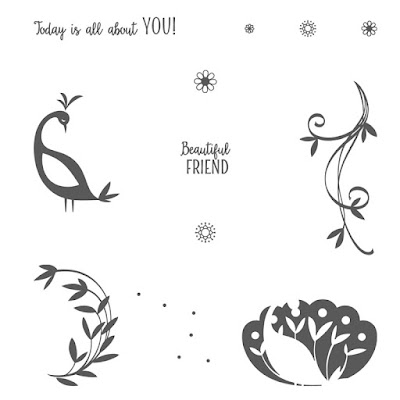
Love, love, LOVE the sparkly wonderfulness of the Dazzling Diamonds Glimmer Paper! Photos just don't do it justice. And that glimmer paper wing? That was an "opportunity for embellishment" that turned out looking better than my original design!

 Beautiful Peacock, SAB, Sale-A-Bration 2018, Stampin' Up!,

On to the craft room organization..... and a reminder. I have included affiliate links to the products that I bought, and recommend, on Amazon. If you click the link and buy something, I get a tiny fraction of a percent of the sale. It helps me support my crafting addiction hobby! This disclaimer is also at the bottom of every page on my blog.

For ribbon storage, these bins are so perfect, you'd think they were made specifically for Stampin' Up! ribbon. I mean, seriously, look at how neatly the rolls fit! And the bins stack, too!

Organizing, Organization, Craft storage

This is how I store the Washi Tape and Baker's Twine. Again, it's such a perfect fit, it's almost like they were designed just for washi and twine! I have two units, stacked.

Organizing, Organization, Craft storage

Organizing, Organization, Craft storage

I keep acrylic blocks,  various adhesives, Stampin' Mist, and envelopes in this clear container. The little wooden box beside it holds the stamp scrubbers, Stampin' Pierce mat, and foam pad for the Big Shot Die Brush. My daddy made that box; it's not available for purchase.

Organizing, Organization, Craft storage

 My ink refills (every color!) fit in this bin in the drawer unit that slides under my desk. I made little chipboard dividers to separate the color families. And, actually, there are two bins stacked in the drawer - the one underneath has the Memento refill, spares of Basic Black Archival, retired colors, etc. Helpful hint: Punch a 1/4" circle of the coordinating colored cardstock and glue it to the top of the ink refill caps. You can tell at a glance which color you are searching for!

Organizing, Organization, Craft storage

Organizing, Organization, Craft storage

This is what my happy place looks like! Everything I need is within easy reach of my desk, or within a short scoot of my wheeled office chair. I love being able to see everything, but not if it's a jumbled clutter. I have one Big Shot on my desk, set up for dies with the magnetic platform. The other "Mr. Big" is in front of the ink pad storage unit, and is set up for embossing folders.

Organizing, Organization, Craft storage

The ink pads and punches are in Stamp n' Storage units, with stamp cases stored on top. My hubby had to put up an extra shelf for the stamp cases. *grin*

Organizing, Organization, Craft storage

I'm saving the paper storage reveal for another time because it's still a work in progress.

Product List

Sunday, January 28, 2018

The Stamp Review Crew is Sale-A-Brating!

https://stampreviewcrew.blogspot.com/2018/01/SAB2018.html

Welcome to the Stamp Review Crew's bonus hop for this month! Since we have an extra Monday, we thought it would be extra fun for each of us to choose any Sale-A-Bration set, rather than all focus on one stamp set. This should make for a fun hop!!! Bronwyn was ahead of me, but if you started here, just follow the link at the bottom to go forward (or backward) to the next blog.

http://www.stampinup.com/ECWeb/ProductDetails.aspx?productID=147239&dbwsdemoid=2054459

I hadn't played with the Beautiful Peacock set yet, so this was the perfect opportunity to show it some inky love! I also paired it with another free Sale-A-Bration choice, the pretty Tutti-Frutti Cards & Envelopes.

Beautiful Peacock, SAB, Sale-A-Bration 2018, Stampin' Up!, Birthday,

Instead of using the card base as-is, I cut it down so that I could mat it on Lemon Lime Twist. I think the clean white border helps set off the image, don't you? The rhinestones were colored with a Light Old Olive Stampin' Blend marker to imitate the Lemon Lime Twist.


The inside of the card was dressed up with a 3/4" strip of the leftover card base, stamped with the same daisies as on the front.

Beautiful Peacock, SAB, Sale-A-Bration 2018, Stampin' Up!, Birthday,

The peacock tail and daisies were stamped off once before decorating the envelope flap. Just a little tease of what is inside!

That's my SAB share for today - up next is Karen! Thank you for stopping by!

http://inkersworkshop.com/2018/01/stamp-review-crew-bonus-hop-any-sab/http://addinktivedesigns.com/2018/01/29/the-stamp-review-crew-sale-a-bration/


Product List