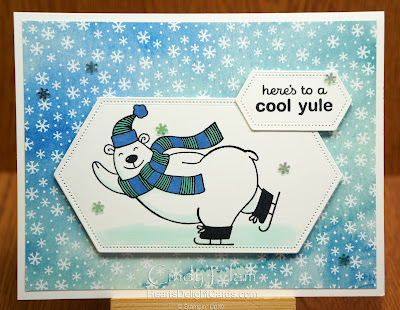
Here we are, just over five months away from Christmas, and other than cards I've made to post I have not started my Christmas cards. EEP! So to inspire you, and kick my lazy butt into gear, here is Day 1 of the 12 Days of Christmas in July. Measurements and instructions follow.
I just can't seem to put down the Warm & Toasty stamp set. You know I don't usually go for "cute" stamps, but this one just grabbed me and begged me to play with it. So who was I to resist? The polar bear is a great image to color because it doesn't take much coloring AT ALL! Pretty much just his hat and scarf. I added a little Light Pool Party to make some shadows and that was it.
Remember, buy any bundle in August from the upcoming 2020 Aug-Dec Mini Catalog, which starts August 4th, and received a pre-cut, ready to stamp and assemble card kit (4 cards and envelopes) from me! The kit will include any dies cuts and embossed pieces, as well as embellishments needed to complete the cards. All you need is stamps, ink, and adhesives.
Measurements
Card base: Whisper White 5-1/2" x 8-1/2" scored/folded at 4-1/4"
Image: Whisper White 3-1/2" x 5-1/2"
Greeting: Whisper White 1-1/2" x 2-1/2"
DSP: Snowflake Splendor 4" x 5-1/4"
Instructions
- Stamp polar bear on larger (3-1/2" x 5-1/2") Whisper White cardstock using Memento Tuxedo Black ink. Color as desired with Stampin' Blends markers.
- Die cut using second-largest Stitched Nested Labels die.
- Stamp greeting on smallest Whisper White cardstock using Memento ink, and die cut using second-smallest Stitched Nested Labels die.
- Adhere DSP to card base.
- Adhere polar bear image to card with Stampin' Dimensionals. Do the same with the greeting, adding some liquid glue where the panels overlap.
- Now add some sparkle with Adhesive-backed Snowflakes and you're done!


No comments:
Post a Comment
Thank you for visiting - I'd love to hear from you!