Are these not the cutest little Christmas tags?! These were some of the things I colored when I was stamping with friends a couple weeks ago. The Seasonal Chums and matching Seasonal Tags Framelits made it super easy to make these tags!
I started with a Whisper White base and added a layer of the polka dots from the Fabulous Foil Designer Acetate. Then both were cut with the (retired) Ornate Tag Topper Punch. Just to dress it up a bit, some leftover gold foil tape from a Paper Pumpkin kit was added to the bottom edge.
After stamping the "To: From:" inside, the little deer were adhered on the tops with Mini Glue Dots, and 1/8" Sheer White Ribbon was added to tie them onto their gifts.
I'm so excited because starting today you can see the holiday catalog in its entirety! The new stamps, DSP, tools, and embellishments are fabulous!!! If you don't have a paper copy from me and would like one, just let me know. Meanwhile, you can see it by clicking the image on the left side of this page!
Today's card uses another image from the Seasonal Chums set. Isn't this little deer just a little dear?! Just too cute! That's a gold Foil Snowflake behind him. The snowflakes come 24 in a pack - 12 each of gold and silver. You can find them on page 47!
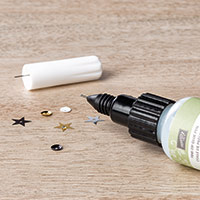
After stamping the little guy on Shimmery White and coloring him, I added some Fine-Tip Glue to the bell to give it some shine.
So here it is, September 1st already, and I still haven't started my Christmas cards in earnest. I think I'll make some more of these and put them in the card box to send in December!
By the way, there is an awesome Host Promotion going on in September and October. Details coming tomorrow but you can see a preview now!
Here's the "How To"
Deer: Shimmery White 2" x 2-3/4"
Circle: Whisper White 2-1/2" x 2-1/2"
DSP: Quilted Christmas DSP 1-1/2" x 5-1/2"
Foil strip: Gold Foil 1/2" x 5-1/2"
Card base: Whisper White Thick 5-1/2" x 8-1/2" scored & folded at 4-1/4"
Adhere foil snowflake to card base. Adhere foil strip to back of DSP with 1/8" showing, and then adhere to card base.
Die cut circle with the 2-1/8" die in Layering Circles Framelits. Stamp greeting and adhere over snowflake.
Stamp and color deer, then die cut with coordinating the framelit in Seasonal Tags Framelits. Trim around the antlers and adhere to card with dimensionals.
Product List (Note: Seasonal Chums is available in both wood- and clear-mount options)
The Cookie-Cutter Christmas bundle is just about the ca-utest thing I've seen in a long time. So many ideas are swirling in my head! The gingerbread boy was going to be the first one to see ink, but I suddenly had an idea for a humorous card using the reindeer, and this is the result. I was going to use googly eyes, but such are the nature of googlies that you can't direct them where you want them, and I wanted them to be focused on Rudolph's nose.
You can get the Cookie-Cutter Christmas photopolymer stamp set separately, but if you bundle it with the Cookie Cutter Builder Punch, you save 10%. And you will want that punch, because there's a Fall/Halloween stamp set that goes with it, as well!
Remember, these sneak peek items will be available to order September 1st. If you've ordered through me in the past year, your copy of the catalog will be mailed within the next week. Be on the lookout!
Two quick tips:
If you're going to be punching the reindeer out with the punch, stamp it upside down with the antlers near the edge of the paper.
The Cable Knit Dynamic T.I.E.F. is unlike any we've had in the past. The first thing you will notice is it's thick and heavy! You will use just the platform, with no tabs, and only ONE cutting pad. Yes, it's that thick! So the "sandwich" is: Platform, embossing folder with ONE layer of cardstock inside, and clear cutting pad on top. Make sure the folder of the folder feeds into the Big Shot first! Its is recommend to lightly mist your cardstock first to prevent the paper from cracking, since it makes such a deep impression. Trust me, my photo does not do it justice!