Showing posts with label Touches of Texture. Show all posts

Tuesday, August 23, 2016

Time for Thanks


Here is one of the Thank You cards I just sent out. I don't know what this fold is called, double flap fold maybe? You lift up the image flap, fold down the inner flap, and inside is the sentiment.


I wrote a little note under the stamped sentiment, but didn't want to show it here. Trust me, the polka-dot flap flips down and there's more.

Smiley from Millan.Net

Retired DSP was used here, but you can certainly use current stuff if that's what you have. After the boots were stamped in Soft Suede, they were colored with Copic markers, then masked so the spatters could be stamped.

Measurements
Card base: 4-1/4" x 8-1/4", scored and folded at 2-3/4"
Designer Series Paper: 2-1/2" x 4" for flap and 4" x 5-1/4" for inside

Smaller flap: 3" x 8-1/2", scored and folded at 4-1/4"
Contrast cardstock: 2-3/4" x 4" (I used the piece trimmed off the card base)
Image panel: Whisper White 2-1/2" x 3-3/4"
Inside panel for sentiment: Whisper White 2-3/4" x 4"

Product List

Wednesday, August 10, 2016

Sympathy in Pink


Recently a friend of mine lost her mother, and it all happened just so suddenly. She wasn't feeling well, they went to the ER, she was admitted to the hospital, and just continued downhill. I don't think they know yet why. I can't even....there just aren't words.

Typically I would make a card with more somber colors, but her favorite color was pink, and it just seemed so appropriate to make the card pink.

Here's the "How To"
Image panel: Watercolor Paper 2-3/4" x 4"
Mat: Basic Black 2-7/8" x 4-1/8"
DSP: Pink Pirouette (retired) 4" x 5-1/4"
Mat: 4-1/8" x 5-3/8"
Card Base: Whisper White Thick 5-1/2" x 8-1/2", scored and folded at 4-1/4"
  1. Adhere DSP to Basic Black mat and then to card base. Set aside.
  2. Rub Embossing Buddy over smaller Whisper White cardstock. Stamp flowering branch from Touches of Texture using VersaMark ink, cover with gold embossing powder, tap off excess and heat with Heat Tool until melted. Do the same for the greeting.
  3. Color branch with Blender Pen, then stamp Pink Pirouette spatters from Gorgeous Grunge.
  4. Adhere to Basic Black mat. Wrap ribbon around and fasten to back. Attach matted image to card base with dimensionals.
  5. Tie a bow and attach with Glue Dot.

Product List

Monday, July 18, 2016

I'm Bringing Back Happy Mail


Another batch of happy mail cards were sent out today! It does my heart good to know that in a few days, some special people will be opening their mail boxes and finding something fun, instead of bills and junk mail. And it also makes my heart happy that I am using some Designer Series Paper and embellishments that I have been hoarding collecting for a few years. I can't think of a better use for it!

This is a one-off card, but most of the others were variations of this in different colors and with different stamps. I hope it brings a smile to the recipient!

Here's the "How To" Image panel: Shimmery White 2-3/4" x 4" Mat: Dapper Denim 2-7/8" x 4-1/8"
Embossed panel: Whisper White 4" x 5-1/4"
DSP: Marina Mist (Subtles DSP Stack) 1-1/2" x 4" Card base: Whisper White 5-1/2" x 8-1/2", scored at 4-1/4" and folded
  1. Emboss Whisper White panel with Petal Burst embossing folder and adhere to card base.
  2. Add DSP to bottom of embossed panel, and a strip of Washi Tape to cover seam. (I used the retired Metallics Glitter Tape.)
  3. Stamp flower outline in Dapper Denim, filler in Marina Mist, and stem in Garden Green on shimmery white. Paint leaves with Aqua Painter or Blender Pen. 
  4. Stamp greeting from Flourishing Phrases.
  5. Adhere image to mat, and mat to card base.
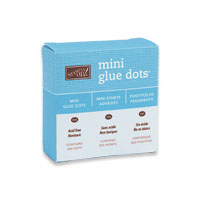
  6. Tie a bow with silver twine (also retired) and adhere with Glue Dot.
NOTE: I used the Cross-Stitched Rectangles die from Lawn Fawn on the image panel.

Product List


Monday, July 11, 2016

WHAT Have I Done???


I accepted the 30 day #imbringingbackhappymail challenge by Lyssa Zwolanek, is what I "done." She wants to bring happy mail back, like Shannon West is bringing birthdays back. Who wouldn't love to find a handcrafted card in their mailbox, when most of the time it's bills and junk mail? Well, I took Lyssa up on it and posted on Facebook that, for the next thirty days, I would send a happy mail card to anyone who wants one. Well, after a slow start the count is now up to 36 cards! Yikes!!! I guess I really can't say I'm overwhelmed though, since Shannon's birthday card list is at about 2,000!

So this is one of eight cards that went out today. And I'm going to keep this post short, because I have a lot of card-making to do!

Here's the "How To"
Image panel: Shimmery White 2-3/4" x 4"
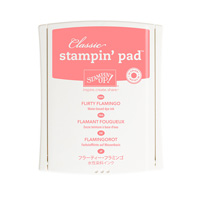
Mat: Flirty Flamingo 2-7/8" x 4-1/8"
Card base: Whisper White 5-1/2" x 8-1/2", scored at 4-1/4" and folded
  1. Stamp background from Touches of Texture in Flirty Flamingo ink on card base.
  2. Add a strip of Flirty Flamingo striped Washi Tape 3/4" from bottom of card base.
  3. Stamp flower bunch on shimmery white and color with Aqua Painter and ink pad. Stamp greeting from Bunch of Blossoms.
  4. Adhere image to mat, and cut doily in half, fastening to back of mat.
  5. Use adhesive to adhere matted image/doily to card base.
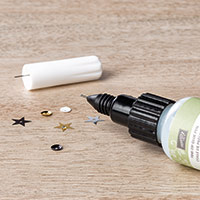
  6. Use Fine-Tip Glue Pen to add sequins and white baker's twine bow.
NOTE: I used the Cross-Stitched Rectangles die from Lawn Fawn on the image panel.

Product List