Showing posts with label Floral Phrases. Show all posts

Saturday, November 26, 2016

Beautiful Day


Good morning! It IS a beautiful day today, but the reason for the post title is that's the name of the Altenew stamp set that was used for this thank you card. Don't red and black make the most stunning color combination?! I knew the recipient's favorite color is red, so that's why I chose it.

I did a bit of fussy cutting on the blossom, but have since ordered the coordinating dies, so I won't need to do that again! Even though the flower stamp wasn't made by Stampin' Up!, it was so beautiful that I just had to have it!


Still working my way through my retired DSP, eating that elephant one bite at a time, as they say. The black and white strip is from Everyday Chic, but you could just as easily substitute one of the black patterned papers from Pop of Pink Specialty DSP.

This is really a very simple, yet elegant card to make!

Here's the "How To"
 Image: Whisper White 2-3/4" x 8-1/2"
 DSP: 1-3/4" x 5-1/2"
 Card base: Whisper White 5-1/2" x 8-1/2" scored and folded at 4-1/4"
  1. Adhere DSP to card base slightly lower than centered.
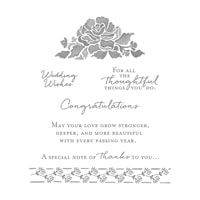
  2. Stamp greeting (from Floral Phrases) below DSP, toward the right.
  3. Using Basic Black ink, stamp outline of blossom once and leaves twice on white 2-3/4" x 8-1/2" cardstock.
  4. For leaves, stamp the second leaf overlay stamp (not the solid one) in black over the leaf outlines.
  5. For blossom, stamp the second, third, and fourth overlays in Real Red over the blossom outline.
  6. Cut blossom and leaves out. Glue leaves to card base with liquid glue. Adhere blossom to card base with dimensionals.
  7. Adhere Rhinestone to center of blossom. Note: I colored the largest clear rhinestone with a red Sharpie.
  Product List

Saturday, October 8, 2016

Special Note of Thanks FMS257


I'm playing along with this week's sketch challenge at Freshly Made Sketches. It's a simple sketch, but I didn't know what direction to take with it; Christmas, Halloween or Thanksgiving? Birthday? Thinking of you?

The Serene Scenery DSP stack was still sitting on my desk from this card (and yes, my desk is a total mess!) so I thought I'd flip through it to get some inspiration. I also happened to have my 'box o' useful bits' open and I saw this tree that I had die cut and never used. I started picturing a tree silhouette with day break in the background. There just happened to be the perfect background paper in that stack, and with a few swipes of a sponge, I had myself a new day a-dawning! And an awesome thank you card.

Here's the "How To"
 Tree: Early Espresso 3-1/2" x3-1/2"
 Moon: Watercolor Paper 1-3/4" x 1-3/4"
 Background: Serene Scenery DSP 3-5/8" x 4-1/4"
 Mat: Early Espresso 3-11/16" x 4-3/8"
 Card base: Very Vanilla 4-1/4" x 11" scored and folded at 5-1/2"

  1. Stamp hills from Thoughtful Branches in Early Espresso on DSP. Lightly sponge So Saffron and Calypso Coral above the hills.
  2. Using spatters from Gorgeous Grunge and Whisper White Craft ink, stamp "stars" at top of DSP. Let dry thoroughly (can help speed it up with heat tool).
  3. Adhere DSP to mat and then to card base.
  4. Die cut tree from Early Espresso using Beautiful Branches die. Die cut moon from Watercolor paper using second smallest Layering Circles die. Use Softly Falling embossing folder to deboss moon craters.
  5. Adhere moon and tree to card with liquid glue.
  6.  Stamp greeting from Floral Phrases below with Early Espresso ink.
  Product List

Wednesday, June 8, 2016

Floral Boutique Suite is Sweet!

This has to be my favorite suite in the new catalog (pg. 77)....at least for the moment, anyway! First of all, the DSP is a classic, cool, clean color combination of navy blue and white. Then there's the stamp set, which not only has a great floral image (can't wait to color marker-to-stamp on that one!), but the messages are a combination of script and print fonts, which I love. And last, but not least, there is a fabulous Thinlits die that is to die for! (heh heh)


This card was a lot of fun to make, but a teeny bit tricky due to using the embossing folder on just the upper half. This is a top fold portrait orientation card, meaning the card base was cut 4-1/4" x 11" and scored/folded at 5-1/2". So how to emboss the top half without also embossing the back side of the card? Open out the card so it lays flat, and slip it sideways into the embossing folder. When you lay the TOP clear cutting pad on, have the edge of the pad even with the fold line, so no pressure is put on the cardstock beyond that point!


Here's the "How To"
Card base: Whisper White 4-1/4" x 11", scored/folded at 5-1/2"
DSP: Floral Boutique 2-1/4" x 4-1/4", adhered 1/8" from bottom on inside of card base
  1. Use smaller Detailed Floral Thinlits Die and matching edge die on card front, near bottom. Note: these can be used together in one pass through the Big Shot. I do highly recommend the Precision Base Plate and the Die Brush. The plate makes cutting detailed dies easy and the brush deals with the little fussy bits of "confetti" left over.
  2. Stamp greeting just above openings of die cut.
  3. Stamp border image just above greeting.
  4. Emboss top half of card front above border as instructed above.
That's it! A quick, relatively easy, and elegant card ready to send to someone special.

Product List