Showing posts with label Stampin' Up! 2016 Annual Catalog. Show all posts

Monday, May 22, 2017

A Different Baby Card


We have a lot of deer here. And by a lot, I mean we've counted thirty-two at one time in our hay field!
Smiley from Millan.Net
That mob hung around for a while, but seems to have dispersed. Now we are seeing small bachelor groups of maybe four to six. This is the time of year the does are off birthing their fawns, and it's always so exciting to spot the first fawn of the year. (Heh heh, "spot" the first fawn.) The only trouble is, while we love watching them, they are are real problem when it comes to our young orchard and garden-to-be.


There is a chicken wire fence around everything but they could hop over it without any effort, so we're looking to "discourage" them with electric fencing. Maybe a little jolt will make the green things on the other side less enticing. Now if it would just work on the darn bugs! Geez, there are a lot of bugs here! As I'm writing this, I'm enjoying the flashes of lightning bugs outside my window. They aren't garden pests, luckily!


In the Meadow is one of the stamp sets that is retiring next week. In fact, I used all kinds of retiring products here, some of which are already sold out, unfortunately. But the stamp set is still available! I thought the mama and fawn would make a great, rather unusual, baby card.

Here's the "How To"
 Image: Shimmery White 2-1/2" x 4-1/8"
 Mat: Basic Black 2-5/8" x 4-1/4"
 Mat: Shimmery White 2-7/8" x 4-1/2"
 DSP: Mint Macaron 4" x 5-1/4" (from 2015-2017 In Colors DSP Stack - RETIRED)
 Card base: Mint Macaron 5-1/2" x 8-1/2" scored & folded at 4-1/4" (STILL AVAILABLE 20% off)
  1. Adhere DSP to card base.
  2. Stamp greeting in Basic Black at bottom of image panel.
  3. Stamp deer above greeting, and then on a sticky note to cut out a mask. Mask off the deer and stamp the trees.
  4. Using an Aqua Painter, add spots of Old Olive to the trees and grass, and a light Soft Suede wash to the deer.
  5. Adhere to black mat and then to Shimmery White mat.
  6. Clip ribbon to top with a mini paper clip.
  7. Attach image to card base with Stampin' Dimensionals.
NOTE: The Mint Macaron Ribbon and DSP Stack is sold out, but the Mini Paper Clips are still available at 40% off.

Product List


Friday, August 12, 2016

It's a Party - With Cake!


Well at least that's the stamp set used on this card - Party With Cake. I kind of really like it because of the humorous sentiments included, especially "Calories don't count today!" Heh heh.

http://www.stampinup.com/ECWeb/ProductDetails.aspx?productID=140672&dbwsdemoid=2054459

This is a great card if you need a card in a hurry; grab some DSP, a couple of punches, stamp, punch and you're done. I'm trying to use up my hoard collection of retired pretties so the whole It's My Party collection of DSP, Washi tape, and enamel dots was used. Sorry to say it's retired, but you can certainly substitute pretties from YOUR hoard collection!

Here' the "How To"
 Banner: Whisper White 1-1/2" x 4-1/4"
 Mat: Melon Mambo 1-3/4" x 4-5/8"
 DSP: 3" x 4-1/4"
 Whisper White scrap for circle punched cake
 Card Base: Whisper White 5-1/2" x 8-1/2", scored and folded at 4-1/4"
  1. Punch Whisper White and Melon Mambo banner using Triple Banner Punch. Stamp greeting in Basic Black ink, then adhere greeting to Melon Mambo mat.
  2. Stamp cake in Melon Mambo ink and punch with 1-14" Circle Punch. (Note: Cake image is from the retired Amazing Birthday set. You can use the slice of cake image from Party With Cake instead.)
  3. Adhere DSP to top of card base. Add Washi tape below DSP.
  4. Stamp Happy Birthday at lower right of card front.
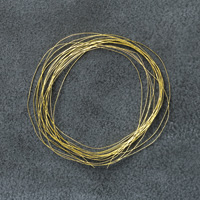
  5. Adhere banner to card base. Add some loops of Gold Metallic Thread to the right, then attach cake with Stampin' Dimensionals on top.
Okay, this makes eleven days in a row that I've posted! Yay, me!
Product List
Tuesday, July 19, 2016

Fun & Fancy Free(ks)!


It's that time again; time for the monthly Control Freaks Tour de Freaks! This month's theme is Fun & Fancy Free, which means anything goes! Should be an interesting tour this month (not that they aren't always, but you know what I mean).

If you started at the beginning, you just landed here from Wickedly Wonderful Creations. Wendy always has something special to share! I'm number two on the tour, and there are fourteen of us this month, so be sure you click the "next" button at the bottom of each page so you don't miss anything!

Hoo boy, my mind went in about a million different directions since we didn't have a theme, but I finally settled on using the gorgeous Serene Scenery DSP stack, and seeing where it would take me. First up is a cute little Bluebird sitting on a twine "wire." We have tons of birds flitting in the trees and shrubs here, so the leaves on this sheet inspired me. I used the Fine-Tip Glue Pen to add some shine to the bird's eyes. (Those leaves look a lot like my poor sapling cherry tree's leaves since the darn Japanese beetles have been at them. Grrr!)

STAMPS: Best Birds  CARDSTOCK: Whisper White, Old Olive, Sahara Sand, Serene Scenery DSP  INK: Basic Black Archival, Pacific Point, Flirty Flamingo  ACCESSORIES: Big Shot, Birds & Blooms Framelits, Black Baker's Twine, Fine-Tip Glue Pen

Next I wanted to use the sheet that had the rustic painted paneling, and immediately thought "country chic" which led me to the cowboy boots in Country Livin'. This card is going to a friend tomorrow, as part of the #imbringingbackhappymail challenge!

STAMPS: Country Livin', Love & Affection  CARDSTOCK: Whisper White, Kraft, Soft Suede, Serene Scenery DSP  INK: Basic Black Archival, Soft Suede, Smoky Slate, So Saffron  ACCESSORIES: Big Shot, Layering Circles Framelits, Blender Pen, 5/8" Burlap Ribbon, 3/8" Very Vanilla Stitched Satin Ribbon

Lastly, I went in a whole 'nother direction with the paper stack. As soon as I saw the dotted Crumb Cake (on the back of what I call the Amber Waves of Grain, lol), I knew it had to be snow! And yes, it is July and hotter'n Hades, but I'm dreaming about cooler seasons just ahead! This card uses the AWESOME limited-release Thoughtful Branches bundle that will be available to customers from August 2nd-31st. The tree was die-cut in Soft Suede and Whisper White. The WW was glued to the back a little offset, so it looks like snow on the branches. Cool, huh? (See what I did there? Heh heh)

STAMPS: Thoughtful Branches, Snow Place  CARDSTOCK: Whisper White, Soft Suede, Serene Scenery DSP  INK: Real Red, VersaMark  ACCESSORIES: Big Shot, Seaside T.I.E.F., Heat Tool, Black Stampin' Emboss Powder, Clear Wink of Stella Glitter Brush, Metallics Sequin Assortment, Fine-Tip Glue Pen

A bit of clear Wink of Stella was added to the ridges of the Seaside T.I.E.F.-embossed cardstock. It looks like snowdrifts, to me!

That's all I have to share this month, so hop on over to Debbie Henderson's blog, Debbie's Designs for more Fun & Fancy inspiration!

http://debbiesdesignsblog.blogspot.com/2016/07/controlfreaksjul2016.html

Wednesday, July 6, 2016

Jar of Love Swaps


This is the design I used for the Control Freaks swap. It's a lot like the Big Jar O' Love card, but with Peekaboo Peach as a contrast. It's amazing how great those colors look together!


Since I didn't have enough silver sequins, I had to use white ones on some of the cards. Which version do you think looks better? (I know the white sequins are subtle and hard to see, so click on the pic for a closer look.)

For the "How to", click the Big Jar O' Love link above, and swap Rich Razzleberry for the Sweet Sugarplum cards base, Peekaboo Peach for the Rich Razzleberry mat and flowers, and use Pumpkin Pie ink to stamp the star flowers.

Sunday, June 19, 2016

Tour de NEW CATALOG!!!

Yep, this month's theme for the Tour de Freaks is anything from the new catalog, woohoo! Since I love just about Every. Darn. Thing in that catalog, narrowing it down was a nightmare! I'm sure the other participants are going to wow you with their projects, so I guess I needn't worry that I couldn't cram them all in here. If you started at the beginning, then you just landed here from Wendy's blog, Wickedly Wonderful Creations. Weren't her projects uh-MAZE-ing? Especially because she just ran 500 miles, and then she ran 500 more! (Well, maybe that's exaggerating a bit....but she did run a half FULL marathon on The Great Wall of China!) To see ALL the Control Freaks creations, just click on the link at the bottom of each person's post.

In an effort to keep things moving right along, we try to limit ourselves to two or three projects, so with extreme reluctance and great self-sacrifice to be a good girl, I only made two cards to share (heehee!). I've really been on a water-coloring binge lately, and both cards reflect it. So, first up is a quickie watercolor wash background, which I think sets off the Flourish Thinlits die beautifully. It really lets the die cut stand out, doesn't it? At first I was going to use colored cardstock, but then thought the au naturel watercolor paper looked better. Some splatters from Gorgeous Grunge added some visual interest, too.

STAMPS: Flowering Flouishes, Gorgeous Grunge  CARDSTOCK: Watercolor Paper, Flirty Flamingo      INK: Flirty Flamingo, Basic Black Archival  ACCESSORIES: Aqua Painters, Big Shot, Flourish Thinlits Dies, 5/8" Burlap Ribbon, 1/4" Gold Natural Trim, Metallics Sequin Assortment, Fine-Tip Glue Pen

The second card took me out of my comfort zone a wee bit. Cutesy cards are really not my style, but the Bella & Friends stamps are so adorable, I just couldn't resist. Besides, now I can make cards to donate to our local animal shelter! (I drew a smile on the pup, because my shelter-rescue dog is always smiling, if not downright laughing.) This would be a great birthday card for ANY age or gender!

STAMPS: Bella & Friends, Suite Sayings  CARDSTOCK: Crumb Cake, Marina Mist, Dapper Denim, Real Red, Watercolor Paper, Subtles DSP Stack  INK: Basic Black Archival, Soft Suede, Real Red, Crushed Curry  ACCESSORIES: Aqua Painters, Balloon Bouquet Punch, Project Life Corner Punch, 5/8" Burlap Ribbon, Gold Metallic Thread, White Stampin' Chalk Marker

Because I was such a good girl (who's a good girl? I was! Yes, I was!), that's all I have for today. Now click the link and go see what Debbie Henderson made over at Debbie's Designs! Thanks for stopping by!

http://debbiesdesignsblog.blogspot.com/2016/06/controlfreaksjune2016.html

Wednesday, June 8, 2016

Floral Boutique Suite is Sweet!

This has to be my favorite suite in the new catalog (pg. 77)....at least for the moment, anyway! First of all, the DSP is a classic, cool, clean color combination of navy blue and white. Then there's the stamp set, which not only has a great floral image (can't wait to color marker-to-stamp on that one!), but the messages are a combination of script and print fonts, which I love. And last, but not least, there is a fabulous Thinlits die that is to die for! (heh heh)


This card was a lot of fun to make, but a teeny bit tricky due to using the embossing folder on just the upper half. This is a top fold portrait orientation card, meaning the card base was cut 4-1/4" x 11" and scored/folded at 5-1/2". So how to emboss the top half without also embossing the back side of the card? Open out the card so it lays flat, and slip it sideways into the embossing folder. When you lay the TOP clear cutting pad on, have the edge of the pad even with the fold line, so no pressure is put on the cardstock beyond that point!


Here's the "How To"
Card base: Whisper White 4-1/4" x 11", scored/folded at 5-1/2"
DSP: Floral Boutique 2-1/4" x 4-1/4", adhered 1/8" from bottom on inside of card base
  1. Use smaller Detailed Floral Thinlits Die and matching edge die on card front, near bottom. Note: these can be used together in one pass through the Big Shot. I do highly recommend the Precision Base Plate and the Die Brush. The plate makes cutting detailed dies easy and the brush deals with the little fussy bits of "confetti" left over.
  2. Stamp greeting just above openings of die cut.
  3. Stamp border image just above greeting.
  4. Emboss top half of card front above border as instructed above.
That's it! A quick, relatively easy, and elegant card ready to send to someone special.

Product List