Showing posts with label Stampin' Up! Birthday Card. Show all posts

Wednesday, August 17, 2016

Birthday Banners


Here is one of the cards that was sent to Shannon for her to send out. I got to use up more retired DSP, but at the rate I'm going, I'll need to live for about 180 more years to use it all up. And that's assuming I don't buy any more. 
(HA! Like that will ever happen!!!)

This is me when the big brown truck comes down the driveway:

Smiley from Millan.Net

I'm tellin' ya, it's like Christmas every other week at my house!

Here's the "How To"
 Image panel: Whisper White 2-1/2" x 3-3/4"
 Mat: Melon Mambo 2-5/8" x 3-7/8"
 Greeting: Whisper White 2" x 4"
 DSP: It's My Party (retired) 3" x 4-1/4"
 Mat: Melon Mambo 3-1/8" x 4-3/8"
 DSP: It's My Party (still retired) 4" x 5-1/4"
 Card base: Whisper White  5-1/2" x 8-1/2" scored and folded at 4-1/4"
  1. Stamp banner and greeting on 2" x 4" Whisper White cardstock. (Melon Mambo and Crushed Curry used here.) Cut out using matching die from Bunch of Banners Framelits.
  2. Stamp candles and flames on 2-1/2" x 3-3/4" Whisper White. Attach to Melon Mambo mat.
  3. Adhere larger DSP to card base. Adhere smaller DSP to it's mat and then both to card base.
  4. Attach candles/mat to card base, and use Stampin' Dimensionals to attach greeting over candles.
  5. Add embellishments, as desired. (Retired It's my Party Enamel Dots used here.)
Product List

15/14

Friday, August 12, 2016

It's a Party - With Cake!


Well at least that's the stamp set used on this card - Party With Cake. I kind of really like it because of the humorous sentiments included, especially "Calories don't count today!" Heh heh.

http://www.stampinup.com/ECWeb/ProductDetails.aspx?productID=140672&dbwsdemoid=2054459

This is a great card if you need a card in a hurry; grab some DSP, a couple of punches, stamp, punch and you're done. I'm trying to use up my hoard collection of retired pretties so the whole It's My Party collection of DSP, Washi tape, and enamel dots was used. Sorry to say it's retired, but you can certainly substitute pretties from YOUR hoard collection!

Here' the "How To"
 Banner: Whisper White 1-1/2" x 4-1/4"
 Mat: Melon Mambo 1-3/4" x 4-5/8"
 DSP: 3" x 4-1/4"
 Whisper White scrap for circle punched cake
 Card Base: Whisper White 5-1/2" x 8-1/2", scored and folded at 4-1/4"
  1. Punch Whisper White and Melon Mambo banner using Triple Banner Punch. Stamp greeting in Basic Black ink, then adhere greeting to Melon Mambo mat.
  2. Stamp cake in Melon Mambo ink and punch with 1-14" Circle Punch. (Note: Cake image is from the retired Amazing Birthday set. You can use the slice of cake image from Party With Cake instead.)
  3. Adhere DSP to top of card base. Add Washi tape below DSP.
  4. Stamp Happy Birthday at lower right of card front.
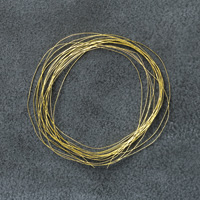
  5. Adhere banner to card base. Add some loops of Gold Metallic Thread to the right, then attach cake with Stampin' Dimensionals on top.
Okay, this makes eleven days in a row that I've posted! Yay, me!
Product List

Sunday, May 15, 2016

2016 In Color Sneak Peek


This is one of the cards we made yesterday in our stamp club. It was inspired by this card on Pinterest, posted by my stamping sister, Lyssa Zwolanek. I wanted to showcase the new Dapper Denim, so I changed it up a little bit. I'm very happy that the two stamp sets used on this card are carrying over to the annual catalog!

I've been playing around with the new In Colors, and I've found some really lovely coordinating colors! The first thing I noticed is how well Dapper Denim pairs with Marina Mist. Oh, it's a match made in heaven, for sure!

That got me to thinking about what else pairs with the new In Colors. I already knew Flirty Flamingo and Watermelon Wonder go together like peas and carrots, but what about the other colors? So I grabbed some cardstock and started comparing, and this is what I came up with:
  • Dapper Denim and Marina Mist
  • Flirty Flamingo and Watermelon Wonder
  • Peekaboo Peach and Pumpkin Pie
  • Sweet Suagrplum and Rich Razzleberry
  • Emerald Envy and Mint Macaron

I'm sure there will be others that are discovered as time goes on, but these ones are a sure hit in my craft room right now!

Here's the "How To"
Image panel: Whisper White 2-1/4" x 3-3/4"
Mat: Dapper Denim 2-1/2" x 4"
DSP: Marina Mist from Subtles DSP Stack
Card base: Dapper Denim 5-1/2" x 8-1/2", scored at 4-1/4" and folded
  1. Adhere DSP to card base.
  2. Cut Tea Lace Doily in half and adhere to left side of card base.
  3. Stamp leaves and flowers from Number of Years near top of Whisper White, and greeting from Suite Sayings near bottom.
  4. Cut 3-1/4" of Dapper Denim Ruched Ribbon and wrap around image panel, adhering to back with adhesive.
  5. Fasten image panel to Dapper Denim mat.
  6. Use Stampin' Dimensionals to affix matted image to card base over doily.
  7. Tie a small bow and attach with a Glue Dot.
STAMPS: Number of Years, Suite Sayings
CARDSTOCK: Dapper Denim*, Whisper White, Marina Mist DSP
INK: Dapper Denim*, Daffodil Delight, Wild Wasabi
ACCESSORIES: Dapper Denim 3/8" Ruched Ribbon*, Tea Lace Paper Doilies (retiring 5/31), Stampin' Dimensionals, Glue Dots
*Available June 1st 

Monday, February 8, 2016

Rosy Birthday


Believe it or not, this is one of the easiest cards to make! If you know how to heat emboss (the gold outlines of the rose and leaves were heat embossed), and you can color somewhat between the lines, then you can make this card. If you don't have watercolor paper, then Shimmery White cardstock will do, which is what was used here. Make sure you use an Embossing Buddy to get rid of any static on the cardstock. Trust me, it makes a big difference!

The "How To" for this card
Image panel: Shimmery White 4" x 5-1/4"
Card base: Whisper White Thick cardstock 5-1/2" x 8-1/2", scored and folded at 4-1/4"

Rub the "buddy" all over the Shimmery White CS, and blow off any dust. Stamp image using VersaMark Ink, then pour gold embossing powder generously over stamped lines. Dump excess powder off image and onto scrap paper, then funnel back into jar. Tap back of cardstock over a waste basket to knock off any loose bits. Heat with Heat Tool until powder has melted.

Squeeze the top and bottom of your (closed) ink pads together to leave some ink on the lids. (They make a great palette to use with Aqua Painters or Blender Pens!) For this card I used Calypso Coral, Crushed Curry, and Mossy Meadow.


Now, let's get painting! Have a paper towel handy for blotting your brush, if needed. Using an Aqua painter, squeeze the barrel until the brush gets wet, but not drippy. Working on just 2 or 3 petals at a time, moisten them with water from your brush, then pick up some of the color from the lid of your Calypso Coral ink pad and spread it around on the moistened areas. This is watercoloring, so you don't want it to be perfect. Some areas will be a little darker and some will be lighter and that's okay! Continue adding more petals, a few at a time, then go back over some areas with a bit of Crushed Curry to give them a glow. Now do the leaves the same way using Mossy Meadow.

This is where practice really does make perfect, so don't be afraid to play around with different amounts of wetness and ink on some practice images. You'll get the hang of it! It really is amazing the shades you can get from one color, from the palest hint of color to the deepest, boldest shade. You can always go back and add more color if it isn't dark enough for your liking. Or if it's too dark, you can blot some of the color off (before it dries, or course!).

Let the image dry and then ink the idges with a Stamping Sponge and some Mossy Meadow ink. Adhere to card base, and add a few sequins (the Fine-Tip Glue Pen is perfect for this). Aaaand, you're done!

STAMPS: Rose Wonder
CARDSTOCK: Whisper White Thick, Shimmery White
INK: VersaMark, Calypso Coral, Crushed Curry, Mossy Meadow
ACCESSORIES: Heat Tool, Embossing Buddy, Gold Stampin' Emboss Powder, Love Blossoms Embellishment Kit (sequins), Stamping Sponges, Fine-Tip Glue Pen