Showing posts with label Papercrafts. Show all posts

Wednesday, August 3, 2016

Happy Birthday, Cupcake


I finally had a chance to play with the Sweet Cupcake bundle and, oh my, it's a lot of fun! It's three-step stamping and the photopolymer stamps make it easy to line things up. (I have plans for using the icing "squiggle" that comes in the coordinating Cupcake Cutouts Framelits dies on some Christmas cards, but I'll share that another day....let's just say the Holiday catalog is full of sweet surprises!)

The background was done with the watercolor "smoosh" technique. You take an acrylic block, tap the ink colors you want to use on it (Pool Party, and Bermuda Bay used here), then lightly spritz it with water and smoosh it onto your watercolor paper. While it's still wet you can move the ink around if you want. I blew some of the drops around, then used the Heat Tool on low to dry it. It's really a fun technique, and no two will look alike. Makes for fabulous one-of-a-kind cards!

Here's the "How To"
Watercolor Paper 3" x 4-1/4"
Bermuda Bay 1-3/8" x 5-1/4"
DSP 4" x 5-1/4" (I used retired It's My Party; you can sub any Mint Macaron DSP)
Whisper White scrap for stamping cupcake and frosting
Card base Whisper White Thick 5-1/2" x 8-1/2", scored and folded at 4-1/4"
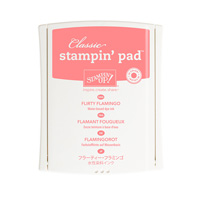
  1. Stamp #1 frosting with Watermelon Wonder. Stamp #2 frosting with Flirty Flamingo. Stamp #3 frosting with Flirty Flamingo, stamped off once. Die cut and set aside.
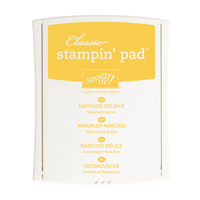
  2. Stamp #1 cupcake with Watermelon Wonder, #2 with Peekaboo Peach, and #3 with Daffodil Delight. Die cut and set aside.
  3. Tap Pool Party and Bermuda Bay ink pads on acrylic block, mist lightly with water-filled spritzer and press onto watercolor paper. Set aside to dry, or use Heat Tool to speed things along. Stamp greeting at top.
  4. Adhere Bermuda Bay strip to DSP, and watercolor paper on top. Wrap gold ribbon around; fastening ends to back. Tie a bow and attach with Glue Dot.
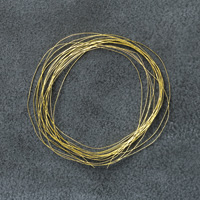
  5. Adhere DSP to card base. Make several loops of gold thread and attach with Glue Dot.
  6. Use Stampin' Dimensionals to Attach cupcake and frosting, and add some shimmer to the frosting with Clear Wink of Stella.
Product List


Tuesday, June 14, 2016

Five Hundred Punches


Here's another one of my favorite bundles from the new catalog, the Best Birds stamp set with the Birds and Blooms Thinlits dies. Such a cute, quick, and easy card to make when you have the right tools, and bundled together you save 10%!

We are greatly enjoying the wide variety of birds here in East Tennessee, so I knew I had to get that bundle as soon as I saw it. And no, there were no punches used on that card....but there were on the color chart below!


I made ten of these charts yesterday to send to new customers, and it took five hundred punches of the Petite Curly Label punch to make them. My thumb and wrist sure felt in last night, let me tell ya, but  it was worth it! Why did I do it? Because I like to include the color chart when sending out catalogs. It's so nice to see the true colors of the cardstock, and I like to spoil my customers a little bit, because I really appreciate them!

Smiley from Millan.Net

Would you like the new Stampin' Up! annual catalog with a custom-made-by-yours-truly color chart? If you are a new customer and don't already have a demo that you're working with, just place a minimum $25 order with me (tax and shipping excluded), and I'll send one out right away! Included will be an Inky High J-INKS Rewards sheet. You can earn a free stamp set (up to $25 value) when the sheet is full! Details are on the rewards sheet.

Now back to our regularly scheduled programming the card.

Here's the "How To"
Circle behind bird: Pool Party cut with third largest Layering Circles die (2-3/8" diameter)
Bird: Marina Mist 2-1/2" x 3-1/2"
Branch: Pear Pizzazz 2" x 5"
Greeting: Scrap of Whisper White
Card base: Whisper White  5-1/2" x 8-1/2", scored at 4-1/4" and folded
  1. Emboss front of card base with Sparkle embossing folder.
  2. Stamp grid in Pool Party ink on circle and attach to left of center on card base.
  3. Stamp bird in Basic Black Archival ink on Marina Mist cardstock and cut out with bird die.
  4. Stamp branch on Pear Pizzazz cardstock and cut out with branch die. Color wood with Soft Suede marker.
  5. Glue branch over circle with Multipurpose Glue.
  6. Place Stampin Dimensionals on bird's head and back and remove liners. Place a little glue on bird's feet and adhere to branch.
  7. Stamp whatever greeting you want, punch out, and adhere to card with dimensionals. (I used a greeting from Flourishing Phrases and the now-retired Washi Label Punch.)
Product List


Sunday, June 12, 2016

Country Livin'


Now here is a subject that is near and dear to my heart! Not only are we finally living our dream of living in the country, but I love old trucks (especially old green ones!), and this one just tickles me. We are sooo in need of a farm truck, because hauling stuff in the utility trailer is a pain in the patoot. But I digress.....

This was one of the cards we made in the Second Saturday Stamp Club this weekend. It's quick to watercolor with an Aqua Painter and the beauty of it is, you don't need to be precise! If you miss a spot, that's okay. If you color out of the lines a bit, that's okay too. It adds character!

Here's the "How To"
Image: Watercolor Paper 2-1/2" x 4"
Mat: Emerald Envy 2-3/4" x 4-1/4"
DSP: 2016-2018 In Color DSP Stack Emerald Envy 2-1/2" x 5-1/2"
Mat behind DSP: Soft Suede 3" x 5-1/2"
Whisper White for greeting 1" x 3"
Card base: Crumb Cake 5-1/2" x 8-1/2", scored at 4-1/4" and folded
  1. Stamp truck on watercolor paper using Basic Black Archival ink.
  2. Color as desired using Aqua Painter and ink squished onto lid of ink pad.
  3. Mat on Emeral Envy mat.
  4. Tear DSP and Soft Suede in random pattern and adhere to card base with bottom edges even.
  5. Stamp splatters in upper corners with VersaMark ink.
  6. Adhere image to card base.
  7. Cut burlap ribbon 5-1/4" long, and cut banner at right end. adhere to card with glue dots.
  8. Stamp banner and greeting on Whisper White, and punch with Duet Banner Punch. Fasten to card with dimensionals.
Product List