Showing posts with label snowflake. Show all posts

Thursday, October 10, 2024

CSF Thursday Challenge - CSF839


This week's Create With Stamping Friends Thursday Challenge is this sketch:

 
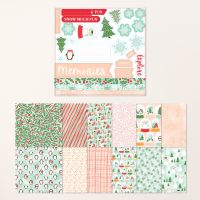
As soon as I saw it, I thought of using DSP for the pieces, and what better DSP than Snowy Scenes, part of the Snowy Scenes Suite Collection? Aren't those penguins adorable? (I mean, really....the little guy above the greeting with the earmuffs holding the gift?! Too cute!) The penguins fit perfectly in the Stylish Shapes 2 1/8" circle die.


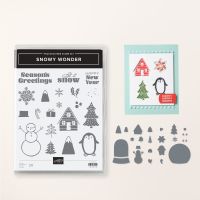
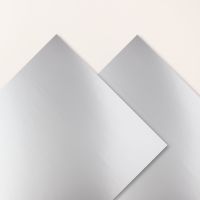
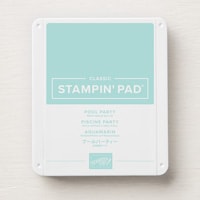
I stamped the snowflakes from the Snowy Wonder stamp set (part of the suite) using Pool Party ink, and then die cut the snowflake from the coordinating die set with silver foil. The silver snowflakes are in lieu of the bow shown on the sketch.


The greeting was fussy cut and popped up on dimensionals over a couple more snowflakes. That silver is the only "embellishment" on this card. 😊

Product List

Monday, January 1, 2024

Stamp Review Crew - Snow Crystal


HAPPY NEW YEAR and welcome to the Stamp Review Crew's SNOW CRYSTAL edition! We're happy to see you for the very first Stamp Review Crew hop of 2024! If you landed here from Debra's blog, Heartfelt Inkspiration, welcome! There are four of us today, so the hop shouldn't take long.


Snow Crystal is one of the Stampin' Up! cling background stamps, and pairs well with other sentiment or image stamps. Since Christmas has just passed, I'm going with a winter and New Year's theme today. First up....the new year!


Snow Crystal was stamped on a Crumb Cake background using White Craft ink and then heat embossed in white.


The greeting (Year to Celebrate) was heat embossed in black on vellum cardstock, and the numbers were cut from More Dazzle Specialty Paper, then glued to the vellum. On the back side of the vellum, I carefully added thin lines of liquid glue behind the greeting and numbers to adhere it to the card without any adhesive showing. That whole panel was then popped up on dimensionals to the Crumb Cake card base.


The winter card started with Snow Crystal stamped in Balmy Blue (stamped off once) on a Basic White panel, then embossed with the Snowflake Sky 3D folder. It was then adhered to the card base with Stampin' Seal.


The label behind the greeting was stamped (Sparkling Snowflakes) in Balmy Blue stamped off twice. It was cut with a Thoughtful Expressions (coming soon!) die, and snowflakes (from Chic Dies) were cut from vellum and Holographic Trio Specialty Paper and adhered to the back.


The label was popped up on the card and the greeting was stamped and fussy cut before being popped up on the label.


That's all I have to share for today, so click "Next" to see what Holly, The Rubber Redneck, created, or "Previous" to visit Deb again. Thanks for stopping by!


Product List

Tuesday, November 19, 2013

It's CHRISTMAS on the Tour de Freaks!


Welcome to the Christmas 2013 edition of the Tour de Freaks! It's the most won-der-ful tiiiime of the year (you sang that in your head, didn't you?), and we're excited to show you some terrific ideas for your holiday.  If you started at the beginning and have been hopping in order, then you just landed here from Mindy Backes' blog, Bada-Bing! Paper-Crafting!  If you're starting here, just click on the links at the bottom of each blog and they will take you full circle back here, so you won't miss a single stamptastic thing!

My first project is a little gift for nectar of the gods coffee lovers.  I've been seeing these tiny hot cups with lids popping up everywhere on the 'Net, and just had to get them to make some quick gifts.  They're filled with Espresso, Coffee, and Latte candies for a quick pick-me-up. Wouldn't these be cute teacher or co-worker gifts? (ETA: These will hold 5 Starbucks Via packets, folded in half.) They're big enough for a tea bag or two, as well. (Don't know about a cocoa packet, though.) The base was covered with Winter Frost DSP, and the lid was topped with a 3D snowflake.


Here's a close-up of the snowflake topper. I was inspired by the Festive Flurry Ornament Kits, making my version small enough to fit on the lid.


For my card projects, I had a hard time choosing which stamp set to feature, but finally decided on Best of Snow.  I just love that little snowman, and the hedgehog is so sweet!  So, let's start with my little snow buddy. He was super easy to color; just a few quick swipes of the markers. And you can't really see it, but the Dazzling Diamonds Stampin' Glitter really makes the snow sparkle.


And here's my little hedgie buddy. I acidentally stumbled on this color combination when some Early Espresso and Soft Sky cardstock was laying next to each other on my *ahem* very messy desk. I was struck by how well they complemented each other. For the Deco Labels mat, I first tried Silver Glimmer Paper, but there wasn't enough contrast. The Red Glimmer sets off the red scarves better, anyway, don't you think? The hedgie was colored with a blender pen to get a lighter shade of Soft Suede. I think the marker would have been too dark.


Well, that's all from me today. Thank you for stopping by! Now on to the next stop, Justin Krieger's blog, JK Cards. I'm sure he has something fabulous cooked up!

http://www.jkcardsonline.com/

Friday, November 1, 2013

Best of SNOW!


I have to admit, I'm really going to miss the monthly "Best of 25 Years" stamp sets when they are no longer available, especially this month's set, Best of Snow. It is extra adorable! You know how I love snowmen, but the hedgehog making a snowman in his image takes the cuteness factor completely over the top!

This is the month to get your holiday cards finished, so you aren't rushing out at the last minute to buy storebought *shudder* cards! And what a great set to use - you can go all crystal elegance on your cards with the snowflake, and make some whimsical cards with the snowman and hedgehog. And the greeting would work on any of them! The Bracket Label Punch makes quick work of adding the greeting, too.

Check out what my friend Jennifer did with it on the Stampin' Up Blog. She's so talented!!!

Tuesday, September 4, 2012

SUOC53 - Boxes and Bags!


I really had fun with this SUO Challenge, because now that summer is ending (it is going to end, isn't it?...soon?...please?), my favorite time of year is beginning - Fall and Winter!  And with those seasons come the opportunity to bake and make all kinds of gifts (both baked and crafty)....which gives me a chance to make neat little packages to put the gifts and baked goods in!


This was a quick box using a flocked window sheet from the Candlelight Christmas Specialty DSP. I thought the Lacy Brocade embossing folder looked a lot like the flocked design on the sheets, so the Brushed Silver cardstock was embossed with it. Add a little ribbon & a snowflake tag, and there's a lovely presentation for the set of greeting cards inside!

HERE'S the tutorial.

Stamps: None
Cardstock: Brushed Silver, White Vellum,Silver Glimmer, Candlelight Christmas Specialty DSP
Ink: None
Accessories: Big Shot, Simply Scored Scoring Tool, Lacy Brocade folder,Scallop Trim Border Punch, Snow Flurry Bigz Die, Whisper White Organza Ribbon, Vintage Faceted Designer Buttons, Rhinestones Basic Jewels, White Twine, Sticky Strip

Tuesday, December 13, 2011

SUO Challenge 34 - Merry & Happy!

What a great theme for this week's challenge at SUO Challenges - all you have to do is make a card that celebrates ANY December holiday! It can be Hanukkah, Kwanzaa, Christmas; it's all up to you! My holiday of choice is Christmas, and since I don't ever have to deal with the fluffy white stuff, I just love snowflakes. I think Mr. Polar Bear does, too.  (I'm sure if I had to shovel it six months a year, and deal with frozen pipes, and snow up to my as...butt, derriere, my perspective would be a lot different.)
Free Smiley Courtesy of www.millan.net
This card is also a sneak peek at the Framelits Labels Collection coming in the new Occasions Mini January 4th! The card was die-cut using the largest Framelit, which measures 5½" at its widest, and is perfect for cutting a card on the fold. It's a 4¼" x 5½" card!

My inspiration for this card came from Sandy Murphy's card.

Stamps: Polar Party
Cardstock: Whisper White, Pocketful of Posies DSP, Silver Glimmer Paper
Ink: Basic Black, Marina Mist, Baja Breeze, Not Quite Navy, Pink Pirouttte, and Poppy Parade Classic Ink
Accessories: Big Shot, Framelits Labels Collection (avail. 1/4), Blender Pens, Baja Breeze 1/2" Seam Binding Ribbon, Snowflake Punch, Baja Breeze Corduroy Button (retired), Jewels Basic Rhinestones, Stampin' Sponge

Thursday, November 10, 2011

Folded Star/Snowflake Tutorial

Today I am grateful that so many people liked the Snowflake/Star I posted yesterday! Since there were some requests for how to make it, here ya go.

It is really simple to make, but precise measurements are important for success. Once you've made the first one, you'll be able to whip a bunch out in no time! Edited to add: Yapha Mason greatly simplified the instructions HERE. Thanks, Yapha!

For the purposes of this tutorial, I will be drawing heavy lines with a Sharpie, so they can be easily seen in the photos, but you will be drawing light ones with a pencil and erasing later.

Supplies you will need:
  • 10" x 10" lightweight cardstock, like Designer Series Paper
  • Stampin' Up! grid paper (102787), or a grid mat
  • Bone Folder (102300)
  • Sharp pencil and eraser
  • Ruler (quilter's ruler works great)
  • Paper Cutter (104152) with cutting and scoring blades
1) On top edge of cardstock, make a pencil mark at the halfway point (5" from either end).

2) Lay cardstock on grid, having edges even with lines, then draw a light guide line down 1½" from original pencil mark, using the ruler to make sure the line is perpendicular to top edge. (Ruler should be on the same grid line at top and bottom of paper.)

3) Now draw an angled 10" line from the lower right corner to intersect the guide line. Have the end of ruler at the lower right corner of your cardstock, and rotate to make the 10" mark on the ruler intersect the guide line. Making sure the ruler hasn't shifted, draw a light pencil line from guide line to corner. Repeat for the left side.


4) Place cardstock in Paper Cutter with 10" pencil line exactly centered over cutting groove. (You can lightly slide the blade without pushing and cutting to check that the center of the blade is going to follow your pencil line.) If it lines up properly, go ahead and cut from one end of the paper to the other.

5) Repeat for the other line. You should now have a 10" equilateral triangle, and the hard part is done!

6) On each 10" side, make a pencil mark at the halfway point, 5" from each end.

7) Using the scoring blade in the Paper Cutter, lightly score between the marks. (Yes, I know the cardstock is different in this pic. It's from the completed sample at the top. I forgot to take a picture of the turquoise shtuff.)

8) Fold up one flap and place crease under the 1½" mark on the ruler. Use edge of ruler to form new flap, folded back. Flatten with bone folder. (Note: If your ruler isn't the 2" wide quilters style, use the grid paper instead. Have the fold on a grid line, count 6 squares up = 1½" and place ruler there.) Repeat for other sides.


9) That's it, just decorate and you're done!  To close the star, fold the flaps in, like folding flaps on a box top. The last one gets tucked under the first.


 Have fun making these!