Showing posts with label Snowman. Show all posts

Tuesday, November 9, 2021

Tutorial Tuesday - Snowbody Better

Happy Tuesday, stampers! Today's card is simply the cutest and easiest thing. And right now I need simple in my life, because this just happened....


Meet Luke, a sweet pup someone dumped at the church nearby. (Expletive deleted) My neighbor found him and his two kitten companions and brought him home, but couldn't catch the kitties. Her dog hated him so she was going to take him to the shelter, but we said we'd love to give him a home, so here he is! The vet says he's about six months old, and a Great Pyrenees mix (which I suspected) so he's going to be a big guy - I'm guessing close to 100 pounds when fully grown. He is now up to date on shots and de-wormer, and will be neutered next month. He potties outside like a good boy, and is learning to come when called. Still LOTS of work ahead, but he is so sweet and loving, and craves affection so I think we will be okay.

Anyhooo, enough about our new addition, which our other dog loves and the cat merely tolerates. 😄 Here are the instructions.

Supplies:
•    Stamp Sets: Snowbody Better (156446)
•    Cardstock: Pear Pizzazz (131201), Basic White (159276), Poppy Parade (119793)
•    Ink: Memento Black (132708), Poppy Parade Blends (154958), Old Olive Blends (154892), Pool Party Blends (154894), Pumpkin Pie Blends (154897), Flirty Flamingo Blends (154884)
•    Tools & Accessories: Stitched Rectangles Dies (151820), Red Rhinestones (146924), Foam Adhesive Strips (141825)
•    DSP:  Heartwarming Hugs (153492)

Measurements:  
•    Card Base: Pear Pizzazz 4-1/4" x 11"
•    Cardstock #2: Basic White 4" x 5-1/4" and 3-3/4" x 5"
•    Cardstock #3: Poppy Parade 1" x 3"
•    DSP:  1-1/2" x 3-3/4"

Instructions:
•    Score Pear Pizzazz card base at 5-1/2" and fold.
•    Use third from largest Stitched Rectangle Die to cut frame from 4" x 5-1/4" layer of Basic White.
•    Stamp Snowbody Better snowmen with Memento Black Ink towards top of 3-3/4" x 5" Basic White.  Color with Stampin’ Blends.
•    Trim top of DSP on a “snowbank” curve.  Adhere to bottom of Snowbody piece.  Adhere centered on base card.
•    Add Foam Adhesive Strips all around the back of the frame. Adhere frame over the Snowbody stamped piece.
•    Stamp You’re Snow Cool with Memento Black Ink on Poppy Parade cardstock, cut with narrow Stitched Rectangle Die.  Adhere to frame at bottom.
•    Add a trio of Red Rhinestones to background as shown.

Product List

Wednesday, September 14, 2016

Christmas Magic Snowman


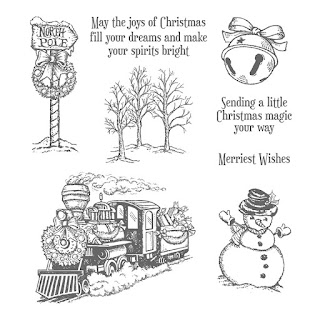
I just love snowmen, and this little fellow is so cute! He's a smallish image, super quick and easy to color, and adding layers under him made him stand out. I've been on an Emerald Envy kick the last couple of days (another E.E. card is coming Friday). I wasn't loving it so much at first, but it's really grown on me! That happens to me so often; a color I fall in love with gets replaced by another favorite.

http://www.stampinup.com/ECWeb/ProductDetails.aspx?productID=142119&dbwsdemoid=2054459

I'm not going to give a "How To" for this card because it's pretty obvious how it was made. Lots of oval layers, and a Softly Falling embossing folder.

Product List

Friday, October 10, 2014

Stampin' Addicts Celebrate Winter!


Welcome to the Stampin' Addicts Winter Holiday blog hop! We are featuring some of the truly awesome products in the Stampin' Up! holiday catalog, and this is the first of fifteen stops on the tour. You may have landed here from Mary Rindal's blog, so just click on the links at the bottom of each blog post to go see the next one!

Today I am showing the Gift Box Punch Board and Cheerful Tags photoploymer stamp set. This punch board is so much fun to use, and the boxes fold together without any adhesive - how cool is that?!

Up first is a shabby chic box using the Under The Tree Specialty Designer Series Paper. It's a heavier weight than our regular cardstock, and makes for very sturdy boxes. There is a different design on each side, so you can choose what works best for your gift situation. This box measures 3-1/4" x 3-1/4" x 1-3/4", a perfect size for candies, several large cookies, or even some cute hand crafted tags!


Next is the Snowman Tower of Gifts! I do love snowmen, and thought the stacked, staggered box sizes would work, with just a little stretch of the imagination. I colored the rhinestones with a black Sharpie to make the "coal" for his face and buttons. And, since he's made of snow I added a few snowflakes from the Frosted Sequins embellishments.


Last is a card using the Cheerful Tags stamps. Because the stamps are made of photopolymer, it's super easy to see exactly where you are stamping. I love the combination of Baked Brown Sugar and Cherry Cobbler (mmmmm, sounds yummy doesn't it?), so I made my own background paper to set off the greeting tag. The 1/8" Circle Punch was used with Champagne Glimmer Paper to make the centers of the snowflakes, because one can never have too much bling in my book!


Well, that's all I have for today....up next is Twila's blog, where she will wow you with the Wonderous Wreath bundle (say that five times fast, lol)! Love the tea light, Twila!!!

http://stampalittlelonger.blogspot.com/2014/10/stampin-addicts-winter-holiday-blog-hop.htmlhttp://www.maryrindal.com/2014/10/stampin-addicts-winter-holiday-blog-hop.html

Tuesday, February 11, 2014

Christmas in February

I know it sounds insane, but bear with me a moment! We've all had some time to recover from the Christmas chaos, right? And even though much of the country is still locked in a deep freeze, and the LAST think you want to think about is winter holidays (come on Spring, for heaven's sake!), if you create beautiful hand-crafted cards (and you send out about 90 of them, like I did last year), you really need to make a few every month. Otherwise, you'll be running around in a panic at the last minute trying to get them finished, signed, addressed and mailed. Where's the fun in THAT? Creativity is supposed to be a fun, relaxing activity, is it not?


Therefore, I give myself the month of January off to recuperate, and am ready to face the task again in February. The Christmas Card Club meets monthly from February until November. That gives us ten months to get the cards finished, and plenty of time to write personal notes and sign them, address the envelopes (I've taken to printing the labels now to save time), and get them in the mail at the beginning of December.

If you can't make it to our Christmas Card Club, why don't you have your own "club" once a month? Just figure out how many cards you need, divide it by ten, and make that many cards every month! Put it on your calendar. Make a date with yourself! You could even invite a friend or two for a fun few hours of crafty time. And just think of how you'll feel when you have that stack of beautiful cards all ready to go without stressing about it?

This card uses the Best of Snow stamp set (available through March 31st), but you could use any of the holiday stamps sets that are still available to order, even though they aren't in the current catalogs.

STAMPS: Best of Snow, Teeny Tiny Wishes
CARDSTOCK: Whisper White, Real Red, Old Olive, Gold Foil Sheets, Old Olive DSP Stack (retired)
INK: StazOn Jet Black, Real Red and Old Olive Stampin' Write Markers
ACCESSORIES: Big Shot, Window Frames Collection Framelits, Banners Framelits Dies, Decorative Dots folder, Rhinestones Basic Jewels


Tuesday, November 19, 2013

It's CHRISTMAS on the Tour de Freaks!


Welcome to the Christmas 2013 edition of the Tour de Freaks! It's the most won-der-ful tiiiime of the year (you sang that in your head, didn't you?), and we're excited to show you some terrific ideas for your holiday.  If you started at the beginning and have been hopping in order, then you just landed here from Mindy Backes' blog, Bada-Bing! Paper-Crafting!  If you're starting here, just click on the links at the bottom of each blog and they will take you full circle back here, so you won't miss a single stamptastic thing!

My first project is a little gift for nectar of the gods coffee lovers.  I've been seeing these tiny hot cups with lids popping up everywhere on the 'Net, and just had to get them to make some quick gifts.  They're filled with Espresso, Coffee, and Latte candies for a quick pick-me-up. Wouldn't these be cute teacher or co-worker gifts? (ETA: These will hold 5 Starbucks Via packets, folded in half.) They're big enough for a tea bag or two, as well. (Don't know about a cocoa packet, though.) The base was covered with Winter Frost DSP, and the lid was topped with a 3D snowflake.


Here's a close-up of the snowflake topper. I was inspired by the Festive Flurry Ornament Kits, making my version small enough to fit on the lid.


For my card projects, I had a hard time choosing which stamp set to feature, but finally decided on Best of Snow.  I just love that little snowman, and the hedgehog is so sweet!  So, let's start with my little snow buddy. He was super easy to color; just a few quick swipes of the markers. And you can't really see it, but the Dazzling Diamonds Stampin' Glitter really makes the snow sparkle.


And here's my little hedgie buddy. I acidentally stumbled on this color combination when some Early Espresso and Soft Sky cardstock was laying next to each other on my *ahem* very messy desk. I was struck by how well they complemented each other. For the Deco Labels mat, I first tried Silver Glimmer Paper, but there wasn't enough contrast. The Red Glimmer sets off the red scarves better, anyway, don't you think? The hedgie was colored with a blender pen to get a lighter shade of Soft Suede. I think the marker would have been too dark.


Well, that's all from me today. Thank you for stopping by! Now on to the next stop, Justin Krieger's blog, JK Cards. I'm sure he has something fabulous cooked up!

http://www.jkcardsonline.com/