Showing posts with label Emboss resist. Show all posts

Monday, January 6, 2020

Beautiful Day, plus Tutorial

Heart's Delight Cards, Beautiful Day, Butterfly, Birthday Card, 2019-2020 Annual Catalog, Stampin' Up!, Emboss resist

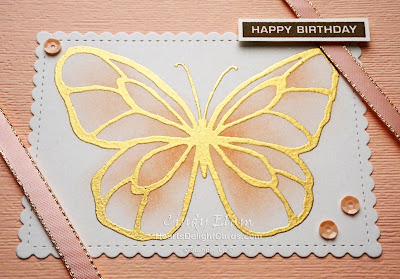
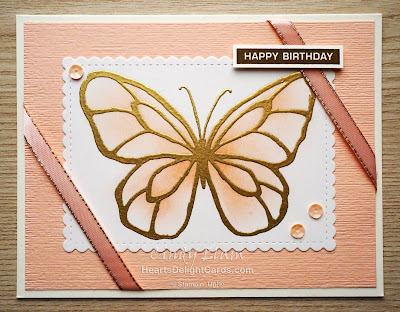
Here is another birthday card using the Beautiful Day set that the Stamp Review Crew just featured. Don't like fussy cutting? No worries - use the Stitched So Sweetly Dies and cut the butterfly that way!

Heart's Delight Cards, Beautiful Day, Butterfly, Birthday Card, 2019-2020 Annual Catalog, Stampin' Up!, Emboss resist

Don't like to fussy color, or feel you don't do it well? No worries - grab a sponge dauber and apply a little color with it! No need to be precise, just rub on a little color.

Heart's Delight Cards, Beautiful Day, Butterfly, Birthday Card, 2019-2020 Annual Catalog, Stampin' Up!, Emboss resist

FYI, I think Shimmery White cardstock yields the best results when sponging on color because it makes blending a lot easier. Handy hint: After dabbing the dauber on the ink pad, tap it on some scratch paper before starting to blend on the artwork. Then starting rubbing in small circles, very lightly, gradually applying more pressure as you go. That helps eliminate the dark ink blotches! So, here are the steps I use:
  • Tap several times on ink pad to pick up color
  • Tap on scratch paper to get rid of excess ink
  • Start gently rubbing on image in small circles, starting where you want the most color, and working outward
  • Repeat!

Cardstock Cuts

  Card base: Very Vanilla 5-1/2" X 8-1/2" scored and folded at 4-1/4"
  Background: Petal Pink 4" x 5-1/4" embossed with Subtle 3D embossing folder
  Image: Shimmer White 4-1/4" x 5-1/2"
  Greeting: Scrap of Very Vanilla

Instructions
  1. Rub Embossing Buddy over Shimmery White cardstock, then use VersaMark ink to stamp the butterfly. Cover with gold embossing powder, tap off excess, then heat with Heat Tool until melted.
  2. Using the steps outlined above, apply Petal Pink ink to the butterfly. Cut out with largest scalloped rectangle in Stitched So Sweetly Dies.
  3. Emboss Petal Pink cardstock with the Subtle 3D folder, then adhere the butterfly panel to it.
  4. Wrap Petal Pink Metallic Edge Ribbon around, adhering ends of ribbon to back, then adhere entire panel to card base.
  5. Stamp greeting in Soft Suede ink on a Very Vanilla scrap. Cut out and adhere to card with Mini Stampin' Dimensionals.
  6. Add Petal Pink Basic Adhesive-backed Sequins.
Product List

Wednesday, February 8, 2017

Carousel Birthday, Ferris Wheel


The other day, when I made the gold embossed carousel horse card, I also embossed the Ferris wheel in the Carousel Birthday stamp set, thinking I could incorporate it somehow. That didn't pan out, so I saved it to use later. And later is TODAY!

I loosely used the Freshly Made Sketches sketch for this week. The size is all wrong, as is the embellishment on the left side, but at least it gave me a starting point!

This is the first time I've played with the 3/8" Metallic Ribbon that's a Sale-A-Bration freebie. I really like it, not only because it's shiny, but it has a soft feel to it and makes lovely bows. But today I played around with it to see if it was easy to ruche, and it WAS! It's super easy to grab a couple threads on one side, pull them up, and scrunch the ribbon into a scalloped shape. I was surprised to see the threads ran in a wave pattern, rather than straight along the side. That's what made the awesome scallops! To keep the threads from pulling out after I got it just the way I wanted it, I used the Fine-Tip Glue Pen across both ends and let it dry before cutting it off the roll. Worked like a charm!

Product List

Wednesday, November 30, 2016

Making Spirits Bright


Today is the last day of the 25% off selected stamps sale, so I thought I'd whip up a quick card using Tin of Tags, which is one of the sale sets.

The large snowflake is included with the various greetings, which made the card so quick to put together. I love the emboss resist technique, don't you? It can really highlight the embossed image!


Although the stamp sets may not be on sale tomorrow, the coordinating Stitched Shapes Framelits will still be available. I just love 'em! You can see the stitched circle if you click on the image to zoom in.

Heads up: the SU retiring list comes out tomorrow, so I will be posting on a day that starts with 'T'. It will be a little later in the day, once I get the list.

Here's the "How To"
 Greeting: Shimmery White 2-1/2" x 2-1/2"
 Mat for greeting: Basic Black 3" x 3"
 Embossed background: Pool Party 3-7/8" x 5-1/8"
 Silver Glimmer strip 1/2" x 3-7/8"
 Mat: Basic Black 4" x 5-1/4"
 Card base: Shimmery White 5-1/2" x 8-1/2" scored and folded at 4-1/4"
  1. Die cut white square with 2-1/8" layering circle die. Die cut black square with second largest stitched circle die. Stamp greeting in Basic Black ink on white circle and adhere to black stitched circle.
  2. Rub embossing buddy all over Pool Party cardstock, then stamp large snowflake from Tin of Tags in VersaMark ink in a random pattern. Do the same with the small snowflake from Hang Your Stocking.
  3. Cover completely with embossing powder, tap off excess and heat with heat tool until melted. Using sponge, rub Bermuda Bay ink over the large flakes in a circular, buffing motion.
  4. Adhere silver glimmer strip about 1-3/8" from bottom of embossed cardstock. Adhere both to black mat and then to card base.
  5. Attach greeting with Stampin' Dimensionals.
Product List