Showing posts with label 2019-2020 Annual Catalog. Show all posts

Monday, January 6, 2020

Beautiful Day, plus Tutorial

Heart's Delight Cards, Beautiful Day, Butterfly, Birthday Card, 2019-2020 Annual Catalog, Stampin' Up!, Emboss resist

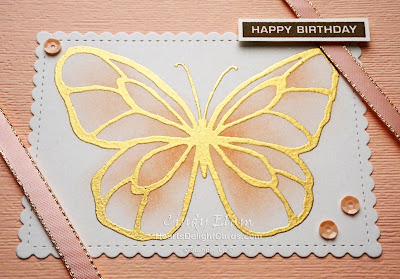
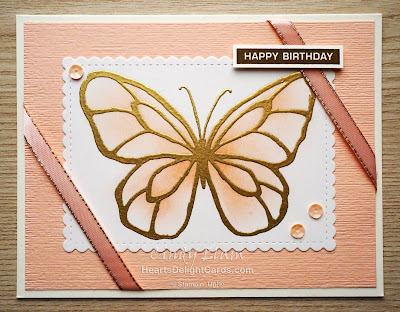
Here is another birthday card using the Beautiful Day set that the Stamp Review Crew just featured. Don't like fussy cutting? No worries - use the Stitched So Sweetly Dies and cut the butterfly that way!

Heart's Delight Cards, Beautiful Day, Butterfly, Birthday Card, 2019-2020 Annual Catalog, Stampin' Up!, Emboss resist

Don't like to fussy color, or feel you don't do it well? No worries - grab a sponge dauber and apply a little color with it! No need to be precise, just rub on a little color.

Heart's Delight Cards, Beautiful Day, Butterfly, Birthday Card, 2019-2020 Annual Catalog, Stampin' Up!, Emboss resist

FYI, I think Shimmery White cardstock yields the best results when sponging on color because it makes blending a lot easier. Handy hint: After dabbing the dauber on the ink pad, tap it on some scratch paper before starting to blend on the artwork. Then starting rubbing in small circles, very lightly, gradually applying more pressure as you go. That helps eliminate the dark ink blotches! So, here are the steps I use:
  • Tap several times on ink pad to pick up color
  • Tap on scratch paper to get rid of excess ink
  • Start gently rubbing on image in small circles, starting where you want the most color, and working outward
  • Repeat!

Cardstock Cuts

  Card base: Very Vanilla 5-1/2" X 8-1/2" scored and folded at 4-1/4"
  Background: Petal Pink 4" x 5-1/4" embossed with Subtle 3D embossing folder
  Image: Shimmer White 4-1/4" x 5-1/2"
  Greeting: Scrap of Very Vanilla

Instructions
  1. Rub Embossing Buddy over Shimmery White cardstock, then use VersaMark ink to stamp the butterfly. Cover with gold embossing powder, tap off excess, then heat with Heat Tool until melted.
  2. Using the steps outlined above, apply Petal Pink ink to the butterfly. Cut out with largest scalloped rectangle in Stitched So Sweetly Dies.
  3. Emboss Petal Pink cardstock with the Subtle 3D folder, then adhere the butterfly panel to it.
  4. Wrap Petal Pink Metallic Edge Ribbon around, adhering ends of ribbon to back, then adhere entire panel to card base.
  5. Stamp greeting in Soft Suede ink on a Very Vanilla scrap. Cut out and adhere to card with Mini Stampin' Dimensionals.
  6. Add Petal Pink Basic Adhesive-backed Sequins.
Product List

Sunday, September 29, 2019

The Stamp Review Crew - Winter Woods

https://stampreviewcrew.blogspot.com/2019/09/WW.html

Welcome to the Stamp Review Crew's bonus fifth Monday hop! The "Crew" is made up of a group of Stampin' Up! demonstrators from around the world who pick a stamp set or bundle to highlight on the first and third Mondays of each month, with a bonus hop if there is a fifth Monday, and that's today! If you landed here from The Stampin' Hoot, welcome!

Today we are featuring Winter Woods, which has a coordinating set of dies called In The Woods. This is a very versatile stamp set, as you will see!
Heart's Delight Cards, Winter Woods, SRC - Winter Woods, Stampin' Up!

Heart's Delight Cards, Winter Woods, In the Woods, SRC - Winter Woods, Stampin' Up!

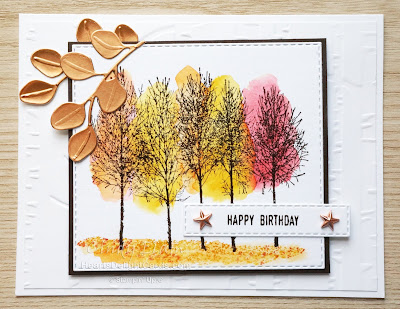
Okay the name may be WINTER Woods, but I think it works just as well for Autumn, as seen here on my first card.

Heart's Delight Cards, Winter Woods, SRC - Winter Woods, Stampin' Up!

I made a watercolor wash background using Crushed Curry, Pumpkin Pie, and Real Red, making sure to dry each color with the Heat Tool before adding another color. After stamping the group of trees (Early Espresso), I used Stampin' Write markers on the "ground" stamp in the same colors as the wash to add the look of fallen leaves.

Heart's Delight Cards, Winter Woods, SRC - Winter Woods, Stampin' Up!

Now, if you want to talk about versatility....doesn't this make a great masculine birthday card?! I thought the copper Star Designer Elements made a nice accent to the birthday greeting, and tied in with the Copper Foil leaves.

Heart's Delight Cards, Winter Woods, SRC - Winter Woods, Stampin' Up!

For the second card, I went all out Winter, pairing it with some Wrapped In Plaid Specialty DSP.

Heart's Delight Cards, Winter Woods, SRC - Winter Woods, Stampin' Up!

The evergreen tree was stamped in Shaded Spruce (what else? *grin*) and die cut, then layered on the plaid background with dimensionals. I heat embossed the greeting in gold, and dry embossed the whole panel with the Winter Knit 3D embossing folder.

Heart's Delight Cards, Winter Woods, SRC - Winter Woods, Stampin' Up!

After adding some Shaded Spruce/Gold ribbon, the plaid panel with the tree was adhered. Some Red Rhinestones Basic Jewels and a gold star completed the tree.

Heart's Delight Cards, Winter Woods, SRC - Winter Woods, Stampin' Up!

Where did I get the gold star? I just colored one of the copper ones with a Dark Daffodil Delight Stampin' Blends marker. 😊

Up next is Jay at Mitosu Crafts - I can't wait to see what he created!

https://www.mitosucrafts.com/?p=11830
https://stampinhoot.com/2019/09/stamp-review-crew-brings-you-winter-woods/


Product List