Showing posts with label Shaker Card. Show all posts

Sunday, December 31, 2017

Stamp Review Crew - Bella & Friends


A very Happy New Year to y'all from the Stamp Review Crew! Can you believe it's 2018 already?! We're baaa-aack with a special bonus hop!

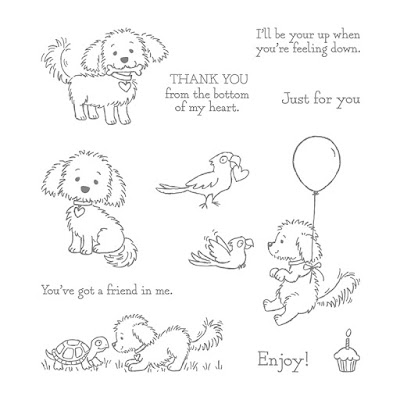
The Stamp Review Crew are a group of Stampin' Up! demonstrators from all across the globe who "gather" on the first and third Monday of each month to highlight a particular stamp set. Today's hop is a bonus! We are showcasing the adorable Bella & Friends stamp set, which was inspired by Million Dollar Achiever, Angie Juda!

http://www.stampinup.com/ECWeb/ProductDetails.aspx?productID=141867&dbwsdemoid=2054459

Yeah, when you hit that $1,000,000 in sales, you get all kinds of perks, and helping design a new stamp set is one of them. I calculated that at the rate I'm going, I should reach that milestone when I'm about 180 years old. *grin* But I digress....

If you started at the beginning of the hop, and are hopping in order, you just landed here from Kelly Kent's blog. Aren't her projects always aMAZing? If you started here, click the 'next' link to go on to the next stop.

Bella & Friends, Stampin' Up!, Shaker Card

As you can see, the Bella & Friends stamp set is totally adorable, and I thought a shaker card for a child, or a special dog who is like a child (not naming any names here, but you know who you are!) would be cute.

Bella & Friends, Stampin' Up!, Shaker Card

Since there are sequins in the shaker, naturally I had to use the Scattered Sequins Dynamic embossing folder! I added some Wink of Stella to some of the embossed sequins, as well as the frosting on the cupcake. And then fussy-cut those two sweet fluffy pups. I'm thinking a short-haired dog would have been a lot easier!

Bella & Friends, Stampin' Up!, Shaker Card

That's my project to share, so now it's off to Mike Funke's blog, Stampin' Style, to see what he has in store for you! Thanks for stopping by, and I wish every one of you a blessed New Year!

 http://mypapercraftjourney.com/2018/01/01/stamp-review-crew-bella-friends/ http://stampin-style.typepad.com/stampin-style/2017/12/stamp-review-crew-bella-friends-1.html

Product List


Sunday, November 19, 2017

Happy Holidays from the Control Freaks!


We're baa-ack! Due to various issues with families, other commitments, vacations, etc. the Freaks needed to temporarily suspend the Tour de Freaks, but we're back in business now! And just in time with some fabulous holiday inspiration!!!

Mary, aka Stamper Camper, was first on the tour, so you may have just landed here from her blog. I'm number two, but if you are starting here, you can continue on to see all eight blogs by clicking the links on the bottom of each page.

I have a couple of cards today, both of them using the Seasonal Chums bundle. One is kind of simple and one more elaborate. Let's start with the simpler one, okay? I fell in love with the Seasonal Chums bundle, especially once the Stampin' Blends were released. The images are so much fun to color, so I started with the dear little deer for my first card.


I combined it with the colorful Quilted Christmas DSP, because I liked the traditional colors and thought they worked well for this card. The stitched holly design on one sheet reminded me that I haven't used the Holly embossing folder much, so it got put to good use today!

Up next is a shaker card using the cute snowman and his bunny buddy! I cut the window all the way through the card front so you could see the houses (from the Hometown Greetings Edgelits) inside.


Aaaand, so you could see the snowman and bunny bums from inside (when the sequins aren't in the way). Isn't that just the cutest thing?! I really had a blast making this card, and got the giggles a couple of times. (I am easily amused, LOL.)


The image was colored with Pool Party, Old Olive, Cherry Cobbler, Smoky Slate, and Crumb Cake Stampin'Blends combos. Those fabulous die cut snowflakes are also in the Seasonal Tags Framelits Dies. They're so cool! (See what I did there, heh heh?)


That's all for this stop, so hop on over to see what Debbie has for you at Debbie's Designs!

https://debbiesdesignsblog.blogspot.com/2017/11/controlfreaksnovember2017.html
 

Saturday, March 4, 2017

All Shook Up


Another piece salvaged from the Box o' Useful Bits today! I used a negative from the Flourish Thinlits die-cut and turned it into a shaker card, using leftover filler from last June's Paper Pumpkin kit. (There are often lots of leftovers in each kit.)

The birthday greeting is from Tin of Cards, which was heat embossed in gold on Shimmery White cardstock to match the negative. All I had to do was adhere the window sheet behind, and add a few strips of the foam adhesive strips and the filler. By the way, those foam adhesive strips make great "extra high" dimensionals, if you want to pop something up higher! No need to stack the Stampin' Dimensionals.

Shaker cards are so easy to make, I don't know why I don't make them more often. Here is a Stampin' Up! video with Brandi Barnard showing the basics of shaker card making:


Product List

Wednesday, June 29, 2016

Alternate Paper Pumpkin

When we got a sneak peek at the sequins that would be included in this month's Paper Pumpkin kit, I thought for sure that we would be making shaker cards, and I was giddy at the prospect. Well, it turns out that the sequins were for clear little banner bags, to use as banners or bags on the cards. Hmmm.... I'm not really into the whole banner mania that's been going on for a while, so I decided to turn my kit components into shaker cards. That's the beauty of it; most of the time I make 'em just as intended, but sometimes I have to color outside the lines, lol.

Smiley from Millan.Net


This one was made for my new Paper Pumpkin subscribers, to show them some alternate uses for their P.P. kits. I do love the sequin colors! Beside gold and white, there are Flirty Flamingo, Peekaboo Peach, and the iridescent ones look like Mint Macaron. So pretty!

There isn't really a recipe for this card. I used the Best Badge punch on a piece of Whisper White, then cut it out with Layering Circles Framelits, making sure there was enough room around the edges for the Foam Adhesive Strip. Cut a slightly larger scalloped circle in Peekaboo Peach, placed the punched circle on and adhered the edges in a couple places, then lined the punch up with the previously punched badge. (I didn't try to punch two layers of cardstock at once - that would have been too much for the punch to handle, I think.)

A piece of Window Sheet was stamped with the bird cage using Basic Black Archival ink. I let it dry completely before cutting and adhering to the back of the badge opening. At this point the baker's twine and bow were adhered to the top of the bird cage.

Another WW circle was cut the same size as the first. The foam strip was added around the edge of this circle, some sequins were placed in the middle, the paper backing was peeled off and the top lined up and pressed down. Handy Hint: When you need to use the foam strips around a curve, make little snips every 1/4" or so, about halfway through the strip. It'll make going around those curves a breeze!


If you are a Paper Pumpkin subscriber, you can get refill kits (without the stamps and ink spots) while supplies last!

Product List