Sunday, January 28, 2018

Petal Palette & Organizing, Part 2 (of 3)

Petal Palette, From the Heart, Occasions 2018, Stampin' Up!, Organizing,

Here's another pretty card to grab your attention before we get down to the card base organization that I promised yesterday. The Petal Palette roses were in the Box o' Useful Bits, as was the Garden Trellis embellished cardstock. I cut the trellis down with Lots of Labels Framelits and added the Fresh Fig mat.

Petal Palette, From the Heart, Occasions 2018, Stampin' Up!, Organizing,

I thought the label needed more contrast from the background so I went with Sahara Sand, embossed with Simple Stripes. I love the subtle contrast of the colors and embossing! Products used are listed at the bottom of this post.

Petal Palette, From the Heart, Occasions 2018, Stampin' Up!, Organizing,

Okay, now, on to the card bases and how I organize them. First, when I cut a piece of colored cardstock to use as a mat, I like to turn the half I'm not using into a card base to save for later. I find the Stampin' Trimmer and Bone Folder make quick work of the scoring. I prefer to use a bone folder, because it gives a deeper score line than the scoring blade that comes with the trimmer.

Petal Palette, From the Heart, Occasions 2018, Stampin' Up!, Organizing,

When I open a pack of Whisper White Thick or Very Vanilla Thick cardstock, I'll spend a couple minutes scoring all of it, and then trimming it all with the Carl Cutter. Most of it is scored lengthwise at the 4-1/4" line (see above), and trimmed to 5-1/2" x 8-1/2". Occasionally I reserve a few sheets and score them at 5-1/2" and trim to 4-1/4" x 11". These are used for top-fold (portrait orientation) cards.

It is just so convenient to pull a ready-to-use card base out of the bin! In addition to card bases, I also have pre-cut card liners for inside of the colored cardstock bases, and 4-1/4" x 5-1/2" Whisper White and Shimmery White pieces ready to grab for stamping and coloring. Note: At the front of the bin are the free Sale-A-Bration Tutti-Frutti card bases, ready to grab and go!

Petal Palette, From the Heart, Occasions 2018, Stampin' Up!, Organizing,

This is the bin that I keep them in on a shelf under my desk. It is 16 inches long, 6 inches wide, and 3 inches deep, the perfect size for card bases AND the smaller Framelits dies envelopes (and embossing folders) as shown below! I keep the newest dies at the front. After carefully prying the dies off the sticky tape, I use the Carl Cutter to cut an adhesive magnet sheet to stick over the tape. Sure makes it easier to get the dies off again without bending them! I put them back in the envelope so I can see the dies, and with the name clearly visible at the top.

Petal Palette, From the Heart, Occasions 2018, Stampin' Up!, Organizing,

Tomorrow I'll share my awesome storage for Washi Tape/Twine and the PERFECT ribbon storage! I'll give you a peek at my craft room, too. It is truly my happy place!

Product List

Saturday, January 27, 2018

Happy Saturday - Let's Get Organized!

Sure Do Love You, Heart Happiness, Valentine, Occasions 2018, Stampin' Up!

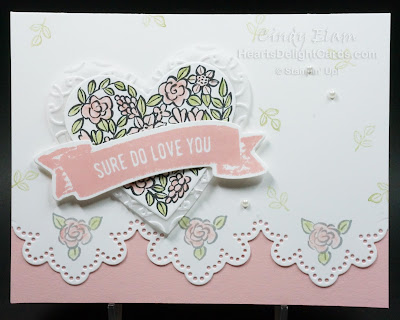
This card is just to get your attention. Did it work? I'm not going to give the "How To", but there is a supply list at the bottom of this post, if you're interested.

Sure Do Love You, Heart Happiness, Valentine, Occasions 2018, Stampin' Up!

The real reason I want your attention is because I want to help you organize your stamping hoard collection. If you are anything like me, when the clutter starts to takes over, the creative mojo has a hard time working. For me, clutter equals chaos in my brain, which means I can't focus on being creative. Periodically I go through my hoard collection of stamping stuff to purge some things, and better organize the things I want to keep. Let's start with Designer Series Paper.

I have a lot of it. I spent the last three days working on it. My local stamping friends and I joke about us being ready for the "Paperpocalypse" but it's not that funny if it's not getting used, and the stash keeps growing. Eventually I'm going to run out of room!

I need to finish listing the colors used for each.

So I decided to cut all the 12" x 12" sheets into 4" x 6" pieces, label them all, and place them neatly into these awesome containers. It serves two purposes - the first is that I've refreshed my memory about what, exactly, I have. And second, it's super convenient now to just grab a sheet that is already pre-cut. (The reason I didn't cut them to 4" x 5-1/4" - sized to fit a card - is because I didn't want to deal with leftover scraps which would have taken up more room in the bins. I can do that as I grab one to use.)

Color Collection stacks - wish they'd bring 'em back!

Yes, I filled TWO bins. And no, I'm not finished cutting up the retired DSP. I just ordered two more bins.....and we'll just leave it at that, okay?

Smiley from Millan.Net

Some observations:
  • Apparently I liked the English Garden and Pop of Pink Specialty DSP the most, because there wasn't much of them left to cut.
  • And apparently I forgot I had the Neutrals DSP stack, because I had duplicates of both the old and the new designs. That's 160 12" x 12" sheets, cut into 6 pieces each. Do the math. And that was just the Neutrals.
Smiley from Millan.Net
I could never have done all that cutting without my trusty Carl Cutter. Yes, it is pricey, but it is an absolute workhorse and worth every penny. It consistently gives crisp, clean cuts and I have not had to change the blade yet, after all that cutting! I use it to prepare card kits for my stamping classes, as well as ready-to-go card bases (more on that tomorrow). The one drawback is, it doesn't handle smaller cuts of less than 2". But that's where my Stampin' Trimmer shines! Between the two of them, I have all my cutting needs handled very well.

Be sure to check back tomorrow for more organization ideas. I know what works for me, and I'm happy to share it with you!

Product List

Friday, January 26, 2018

MIF Design Challenge #2 - Colors!

Lots of Lavender, Party Pandas, Sale-A-Bration 2018, Stampin' Up!, Just Because

Welcome to the second design challenge from My Inky Friends! This time it's a color challenge, inspired by the colors on page 35 of the annual catalog. This is such a fun color combination, and so reminiscent of Spring. I'm about ready for Spring, how about you?

https://myinkyfriends.blogspot.com/2018/01/my-inky-friends-design-challenge-2.html

To play along (and see the Design Teams' inspiration, click the graphic above, or click HERE. Please submit your entry before February 9th, so we can see what wonders you have created and vote for a favorite!

Lots of Lavender, Party Pandas, Sale-A-Bration 2018, Stampin' Up!, Just Because

I decided to use the beautiful Lots of Lavender set from Sale-A-Bration. The image was stamped in Basic Gray, and the Soft Sky filler was over stamped twice. The Berry Burst ribbon was stamped off once to soften the color a bit.

Lots of Lavender, Party Pandas, Sale-A-Bration 2018, Stampin' Up!, Just Because

The blossoms were stamped again on a scrap of Whisper White, and over stamped twice with Soft Sky again. I didn't think the color was a dark enough contrast, so after fussy cutting just part of the blooms, I laid the piece on the ink pad and pressed it down, really getting a darker contrast. The sweet little "Hi" greeting is from Party Pandas, another free Sale-A-Bration set!

Measurements

 Image: Whisper White 1-3/4" x 3-7/8", plus scrap for second layer
 Mat: Berry Burst 1-7/8" x 4"
 Embossed background: Soft Sky 3" x 5-3/8"
 Card base: Soft Sky 5-1/2" x 8-1/2" scored & folded at 4-1/4"

Product List