Showing posts with label Wedding. Show all posts

Sunday, February 2, 2020

The Stamp Review Crew - Forever Blossoms

https://stampreviewcrew.blogspot.com/2020/02/FE.html

Heart's Delight Cards, Forever Blossoms, SRC - Forever Blossoms, Wedding, 2020 Jan-June Mini Catalog, Stampin' Up!

Welcome to the Stamp Review Crew's Forever Blossoms edition! The "Crew" is made up of a group of Stampin' Up! demonstrators from around the world who pick a stamp set or bundle to highlight on the first and third Mondays of each month, with a bonus hop if there is a fifth Monday. If you landed here from Nikki Spencer's blog, My Sandbox, welcome! There are nine of us today, so follow the links for more inspiration!

http://www.stampinup.com/ECWeb/ProductDetails.aspx?productID=151457&dbwsdemoid=2054459

http://www.stampinup.com/ECWeb/ProductDetails.aspx?productID=153781&dbwsdemoid=2054459

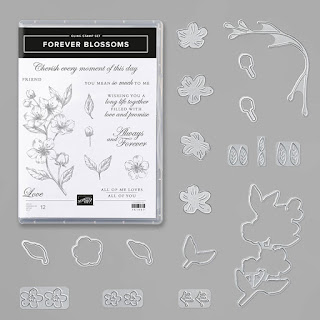
The Forever Blossoms stamp set and bundle are found on page 16 of the Mini catalog and are part of the gorgeous Parisian Blossoms Suite.

Heart's Delight Cards, Forever Blossoms, SRC - Forever Blossoms, Wedding, 2020 Jan-June Mini Catalog, Stampin' Up!

I wanted to make a sweet card for a wedding, and this suite (see what I did there?) is perfect!

Heart's Delight Cards, Forever Blossoms, SRC - Forever Blossoms, Wedding, 2020 Jan-June Mini Catalog, Stampin' Up!

My original idea was to cover the entire front with the Parisian Flourish embossed panel, but then I had the problem of the greeting kind of getting lost. I chopped off part so the Flirty Flamingo base showed and heat embossed the greeting in white.

Heart's Delight Cards, Forever Blossoms, SRC - Forever Blossoms, Wedding, 2020 Jan-June Mini Catalog, Stampin' Up!

But THEN it looked kind of ... choppy ... with a harsh edge. So I trimmed off a bit more and added a Delicate Lace die cut edge. That did the trick!

Heart's Delight Cards, Forever Blossoms, SRC - Forever Blossoms, Wedding, 2020 Jan-June Mini Catalog, Stampin' Up!

And, of course I had to emboss the envelope flap to match! I love the the Spring feel, and Punxutawney Phil predicts an early Spring this year, yay!

Up next is Jay Soriano, at Mitosu Crafts.

https://nikkispencer-mysandbox.blogspot.com/2020/02/stamp-review-crewforever-blossoms.html
https://www.mitosucrafts.com/?p=12895


Product List

Monday, July 3, 2017

Celebration Time Swaps


The idea for this card came to me as I was falling asleep, and I actually remembered it when I woke up! This was made for the Control Freaks Stampers swap, which we do two or three times a year. I thought since it was June (when I made it), and June is the big month for weddings, that a wedding congratulation card would be lovely. If course, you could use the Happy Birthday cake image and make it completely different.


Lots of layers on this card, just like the layered cake, and there is even a layer from the Layered Leaves Dynamic folder! (A little alliteration, anyone?)


The cake was heat embossed in silver and die cut, then the bottom half of the die was used again on a Silver Foil sheet to make the cake stand. The bottom of the cake was trimmed and glued to the cake stand. It was then popped up on dimensionals, as was the greeting (from Best Birds).


Measurements
 Cake: Whisper White 2" x 3"
 Cake stand: Silver Foil sheet 1-1/2" x 2"
 Greeting: Whisper White 1" x 3"
 Background: Whisper White 2" x 3-1/4"
 Mat: Pool Party 2-1/8" x 3-3/8"
 Mat: Silver Foil sheet 2-1/4" x 3-1/2"
 Embossed background: Whisper White 4" x 5-1/4"
 Card base: Whisper White 5-1/2" x 8-1/2" scored & folded at 4-1/4"

Product List

Monday, June 5, 2017

Flirty Flowers and a Challenge


I made this card for the Global Design Project Challenge #090, which is a sketch this week, except I did a mirror image of the sketch:


Flirty Flowers was another stamp set that called my name, and when I saw the little flower and the greeting, I immediately thought "Wedding card!"


I adore the background leaves! That's another new Dynamic T.I.E.F. called Layered Leaves. My post yesterday gave some hints on using these deep-impression embossing folders. They are awesome!

Here's the "How To"
 Flower: Whisper White  1-1/4" x 1-1/4"
 Greeting: Whisper White 1-1/2" x 1-1/2"
 Label: Whisper White 2" x 3"
 Mat: Silver Foil Sheet 2" x 2"
 Embossed background: Whisper White 4-1/8" x 5-3/8"
 Card base: Whisper White 4-1/4" x 11" scored & folded at 5-1/2"
  1. Emboss background with Layered Leaves embossing folder. Adhere silver ribbon 1-1/4" inch from left side, wrapping ends to back. Adhere to card base.
  2. Heat emboss label from Label Me Pretty using Versamark ink and silver embossing powder. Punch with Pretty Label punch.
  3. Die cut silver foil with 1-5/8" circle from Layering Circles Framelits. Adhere to back of label.
  4. Cut three (1-1/2") lengths of Silver Mini Sequin Trim and attach to back with glue dots
  5. Adhere label to card base with dimensionals.
  6. Stamp greeting and punch out with 1-1/4" circle punch. Adhere to label with dimensionals.
  7. Stamp flower in Basic Black ink, and color with blender pen and Pool Party ink. Fussy-cut and adhere with dimensionals.
Product List