Showing posts with label Organization. Show all posts

Friday, July 5, 2019

Craft Room Makeover!

One of the reasons I've been absent a lot lately was due to the fact that my crap craft room had gotten out of hand. There was Too. Much. Stuff crammed into too small of a space, it was a PITA to do anything creative in there, and I was too overwhelmed to do anything about it. Here is a photo of the "before", or actually when I was just getting started and had put a few things on my desk. You can see things crammed into every nook and cranny and it's chaos. I moved the chair so you can see the shi stuff under the table, too.


But when a friend blesses you with a free corner desk, you take that as a sign (and motivation!) to shake things up and make it work. The main hold ups to my big plans were 1- hubby needed to get the farm truck running so we could go and get it. 2- I needed to figure out what to do with stacks of boxes of retired stamping stuff that were in the way, and 3- what to do with the crappy shelving units (and the stuff on them) to make room for my old craft desk, which I loved and didn't want to re-home. Here's an "after" photo taken at about the same spot.


Hubby spent almost two weeks working on that *insert bad word that rhymes with trucking* truck, coming in utterly exhausted nearly every afternoon. But, bless his heart, he somehow managed to do a job that should have taken two strong men and six pairs of hands. Meanwhile, I ordered another small shed to match the one I already had on the porch for my garden stuff, assembled it, and started moving the boxes of retired items out to it.

The things (mainly DSP and cardstock) that were on the crappy shelving units were sorted through, retired things pulled and stored for later sale, and the "keepers" were stacked out of the way. I took apart the shelves, and moved the very heavy 48 slot cardstock holder out of the way. Boy, did it need a thorough dusting! I planned to put the old craft table where the shelving units had been, with the paper holder on top. Since the table is 30" x 63", and the cardstock organizer is 12" x 38" that means there is plenty of room for a friend to come and craft with me!


The heat/AC unit is above where I had stored my stamps on a not very sturdy shelf (see first pic) and I noticed there was an issue when the stamp cases were stored on end. I think the heat blowing on the cases made some stamps slide a little bit off their stickers. I needed to find a way to store them flat. I found these clear acrylic DVD holders and they worked perfectly! Hubby drilled small holes so they could be screwed to the wall directly under my Stamp n Storage punch holders, but they are stackable, too. I just wanted them off the desk!


They are high enough on the wall that all my Storage by Stampin' Up! ink pad & marker trays can fit on the desk underneath, yet I can easily reach just about anything I need from my chair. The few exceptions would be punches near the top of the punch holders, and the ribbons in the storage bins on the very top. (I also have one of those bins in a desk drawer to hold my embossing powders, embossing buddy, and heat tool.)


Speaking of drawer storage, embossing folders and dies are also in bins in the desk drawers! I love how neat and tidy everything looks now! My creativity goes AWOL if there's too much clutter - it clutters my mind and I can't think. It's gotten worse as I've grown older, too. And yes, I usually clean up after each project before starting fresh on new ones, unless I'm planning to use the same stamps and accessories for another card right away.

As noted in my disclaimer at the bottom of the page, I may receive a small compensation from Amazon for products linked here if you click through and purchase them. There is no additional cost to you if you do so. I only link to things that I have personally purchased myself and feel are worthy of recommendation!

Saturday, December 15, 2018

Organizing! (Again)

It's getting to be that time of year again, where I get the strong urge to make things orderly in my craft room. I know it's an uphill battle, which wouldn't be so bad if I'd quit adding more stuff.
HA....like that is ever going to happen!
I can count on three times a year that there will be new DSP added, and three times a year the old DSP will retire, and I can't bear to part with it. The new Occasions catalog will be out in less than three weeks, and I already have all the beautiful DSP in it and the SAB flyer, so I need to make some room!

https://amzn.to/2LfFdpn

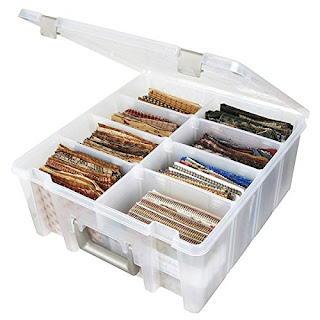
My solution, which I talked about in this post, are these awesome divided ArtBin containers. They hold a ton of DSP that I've cut down to a convenient 4" x 6" size, and separated with labeled dividers.They're even available in several different colors, but I prefer the clear.


I put the name of the DSP at the top of the divider, and then list the coordinating colors for easy reference later. It's especially helpful when colors retire, because I know I'll never remember the names of some of them! Next month I plan to bless the local elementary school with some long-retired paper that I know I will never use. I think I'm ready to say good-bye to some of them. Maybe. I'm sure the teachers can think up something fun for the kids to do with it!

Tuesday, January 30, 2018

Labeled Dividers

When I made the dividers for labeling the DSP in the bins, I took pictures. But then I thought "No one would be interested in this" so I didn't post them. Well, I was wrong, so I'm posting them now! Thank you, Barbara, for asking!

I repurposed the thick white backing sheets that come in the DSP packs. You will be able to cut four dividers (4-1/2" x 6") from each sheet. If the lettering bothers you (I didn't mind, since it would be covered), then you will get three clean dividers.

Here is how I made them tabbed:
  1. I wanted to cut 3" off the divider to make the tab, so I placed a piece of Washi tape on the Stampin' Trimmer at the spot where I wanted to stop the cut.
  2. The divider was placed so the right long edge was at the 3/4" line, then I slid the cutting blade down to the Washi "stop" point.
  3. The excess was trimmed off with Paper Snips.
  4. The Envelope Punch Board was used to punch the "tabs" by sliding the tab edge in to the exact middle of the punch.
  5. This was done on each side.
  6. Then it was simple to label everything with a fine-tip Sharpie!


    Product List

Monday, January 29, 2018

Final Organizing Tips, Part 3 of 3

 Beautiful Peacock, SAB, Sale-A-Bration 2018, Stampin' Up!,

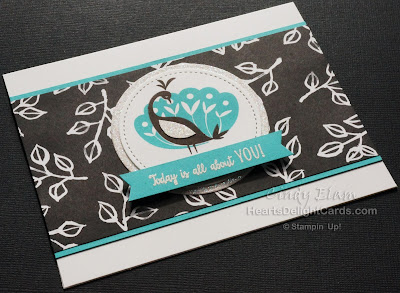
Here is today's attention grabber. Since I had the stamp out for yesterday's Stamp Review Crew blog hop, I threw together this card. (Products used are listed at the bottom.)

 Beautiful Peacock, SAB, Sale-A-Bration 2018, Stampin' Up!,

Love, love, LOVE the sparkly wonderfulness of the Dazzling Diamonds Glimmer Paper! Photos just don't do it justice. And that glimmer paper wing? That was an "opportunity for embellishment" that turned out looking better than my original design!

 Beautiful Peacock, SAB, Sale-A-Bration 2018, Stampin' Up!,

On to the craft room organization..... and a reminder. I have included affiliate links to the products that I bought, and recommend, on Amazon. If you click the link and buy something, I get a tiny fraction of a percent of the sale. It helps me support my crafting addiction hobby! This disclaimer is also at the bottom of every page on my blog.

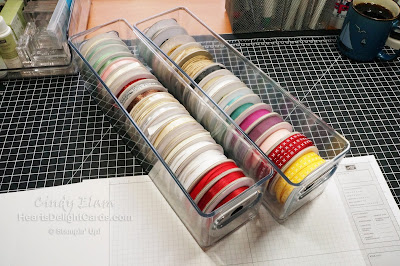
For ribbon storage, these bins are so perfect, you'd think they were made specifically for Stampin' Up! ribbon. I mean, seriously, look at how neatly the rolls fit! And the bins stack, too!

Organizing, Organization, Craft storage

This is how I store the Washi Tape and Baker's Twine. Again, it's such a perfect fit, it's almost like they were designed just for washi and twine! I have two units, stacked.

Organizing, Organization, Craft storage

Organizing, Organization, Craft storage

I keep acrylic blocks,  various adhesives, Stampin' Mist, and envelopes in this clear container. The little wooden box beside it holds the stamp scrubbers, Stampin' Pierce mat, and foam pad for the Big Shot Die Brush. My daddy made that box; it's not available for purchase.

Organizing, Organization, Craft storage

 My ink refills (every color!) fit in this bin in the drawer unit that slides under my desk. I made little chipboard dividers to separate the color families. And, actually, there are two bins stacked in the drawer - the one underneath has the Memento refill, spares of Basic Black Archival, retired colors, etc. Helpful hint: Punch a 1/4" circle of the coordinating colored cardstock and glue it to the top of the ink refill caps. You can tell at a glance which color you are searching for!

Organizing, Organization, Craft storage

Organizing, Organization, Craft storage

This is what my happy place looks like! Everything I need is within easy reach of my desk, or within a short scoot of my wheeled office chair. I love being able to see everything, but not if it's a jumbled clutter. I have one Big Shot on my desk, set up for dies with the magnetic platform. The other "Mr. Big" is in front of the ink pad storage unit, and is set up for embossing folders.

Organizing, Organization, Craft storage

The ink pads and punches are in Stamp n' Storage units, with stamp cases stored on top. My hubby had to put up an extra shelf for the stamp cases. *grin*

Organizing, Organization, Craft storage

I'm saving the paper storage reveal for another time because it's still a work in progress.

Product List