Showing posts with label Big on Birthdays. Show all posts

Saturday, February 17, 2018

Big on Birthdays Meets Spingtime Foils!

Heart's Delight Cards, Big on Birthdays, Springtime Foils, Birthday Card, Stampin' Up!

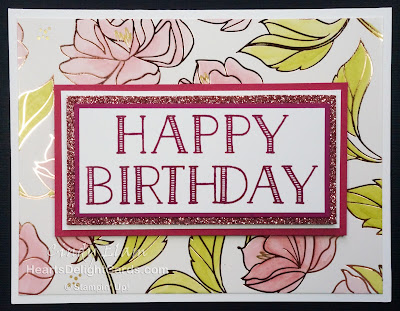
Need a quick, easy birthday card? Look no further! The focus may be on the layered big birthday greeting, but the colored Springtime Foils Specialty DSP background makes a statement as well. This DSP is part of the SAB 2nd Release, and is available for free with a $50 purchase!

Heart's Delight Cards, Big on Birthdays, Springtime Foils, Birthday Card, Stampin' Up!

On the first card, I used Stampin' Blends to color the foiled floral image. The glossy nature of the DSP makes it super easy to color with markers, and the alcohol markers used here dry almost instantly. Do be aware that if you use the water-based Stampin' Write Markers that it will take a little longer to dry! You can speed it along with the Heat Tool set on low.

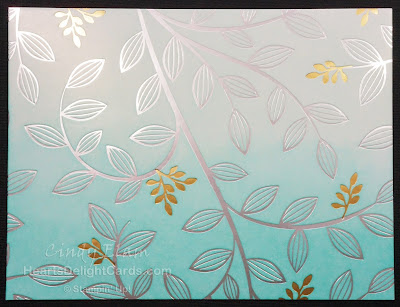
If you want to add a quick splash of color, without getting into detailed coloring, then grab a Stamping Sponge and buff some color on, as I did on this ombre background. Again, the glossy DSP makes it super easy to add color without streaks. Just keep buffing to spread the color!

Heart's Delight Cards, Springtime Foils, Ombre, Stampin' Up!

If you want a REALLY quick card and don't feel like coloring, the Springtime Foils Specialty DSP stands on its own, too. This is a great masculine card - just stamp the greeting, add the mats and Stampin' Dimensionals and it's complete!

Heart's Delight Cards, Big on Birthdays, Springtime Foils, Birthday Card, Stampin' Up!

Measurements (from greeting down to card base)

 Greeting: Whisper White 1-1/2" x 3-1/2"
 Mat (same color as greeting): 1-5/8" x 3-5/8"
 Mat (glimmer or foil): 1-7/8" x 3-7/8"
 Mat: Whisper White 2" x 4"
 Mat (same color as greeting): 2-1/4" x 4-1/4"
 DSP: 4" x 5-1/4"
 Card base: 5-1/2" x 8-1/2" scored & folded at 4-1/4"

Product List
Sunday, March 26, 2017

Avant Garden Birthday, Part II


I really, really am going to be sad to see this set go, can you tell? If you want it, you only have five days left to qualify for it before it's gone forever. And don't even get me started on the In Colors that will be retiring in a couple months! Whatever will we do without Mint Macaron and Watermelon Wonder? That's why I chose those colors for this card. (Cue the dirge for the background music.)

Smiley from Millan.Net

But seriously, it always pains me when fun stampin' goodies retire. The only thing that soothes the agony is the new stampin' goodies that replace them!

Here's the "How To"
 Greeting: Whisper White 3-3/8" x 4-1/8"
 Mat: Basic Black 3-1/2" x 4-1/4"
 Glimmer paper: 1" x 4"
 Card base: Mint Macaron 5-1/2" x 8-1/2" scored & folded at 4-1/4"
  1. Mask off 1-1/8" from center of greeting panel and stamp blossoms using Watermelon Wonder and Flirty Flamingo above and below mask. Stamp flower centers in Basic Black and leaves in Mint Macaron.
  2. Remove mask and stamp greeting in center using Watermelon Wonder.
  3. Attach greeting to mat.
  4. Use Best Badge punch to make a scalloped edge on glimmer paper. Center behind Basic Black mat, adhere, and trim ends even.
  5. Attach greeting to card base using dimensionals.
And there you have an easy-peasy card, ready to wow someone special!
Product List


Saturday, March 18, 2017

Cool Birthday Treats


I haven't played much with the Cool Treats stamp set, yet, so I thought today would be a good day. Now mind you, it's not because the weather calls for a cool treat....far from it. It's been frikkin' COLD this past week! I'm about ready for warmer Spring weather, how about you?


I just like the way the Celebrations Duo embossing folders are a great way to add some WOW to a card, and the Cool Treats set works so well with it. Because the greeting is debossed (indented rather than raised), it's perfect for over-stamping with balloons like this card, or the popsicles, as done here. It may take a couple tries to get the right amount of pressure for a good image, without getting too much in the indented parts. I saw a tip about leaving it in the embossing folder while stamping, but I haven't tried it, yet. I just touch up the ink spots with this extra-fine point white Sharpie.


Some Clear Wink of Stella was added to give those frozen treats a frosty look. I'm sure something cold and frosty will be a lot more appealing in a few months, but for now I'll just admire the ink ones.

My idea of the perfect cold, frosty treat (right, Sherry?)......
 Smiley from Millan.Net

Here's the "How To"
 Greeting banner: Watermelon Wonder 1/4" x 3"
 Image panel: Whisper White 2-1/2" x 5-1/8"
 Mat Watermelon Wonder 2-5/8" x 5-1/8"
 DSP: Tasty Treats Designer DSP 3-7/8" x 5-1/8"
 Mat: Watermelon Wonder 4" x 5-1/4"
 Card base: Whisper White 5-1/2" x 8-1/2" scored & folded at 4-1/4"
  1. Adhere DSP to mat and then to card base.
  2. Emboss "Celebrate" in Whisper White, and stamp treats (ink colors listed below). Note: the Watermelon Wonder treat was stamped off once. 
  3. Add Wink of Stella to treats, then adhere to mat, and attach to card base using dimensionals.
  4. Rub embossing buddy over greeting strip. Stamp greeting (from Big on Birthdays) using VersaMark ink. Cover with embossing powder, tap off excess, and heat with heat tool.
  5. Attach to card with dimensionals (cut in half).
Product List